How to Enable SharePoint Integration for File Uploads from Power Pages Forms
Integrating SharePoint with Power Pages allows users to upload, manage, and access files directly from forms, creating a seamless experience. This blog provides a comprehensive guide to setting up SharePoint integration, configuring document management for tables, and adding a document location subgrid to your forms.
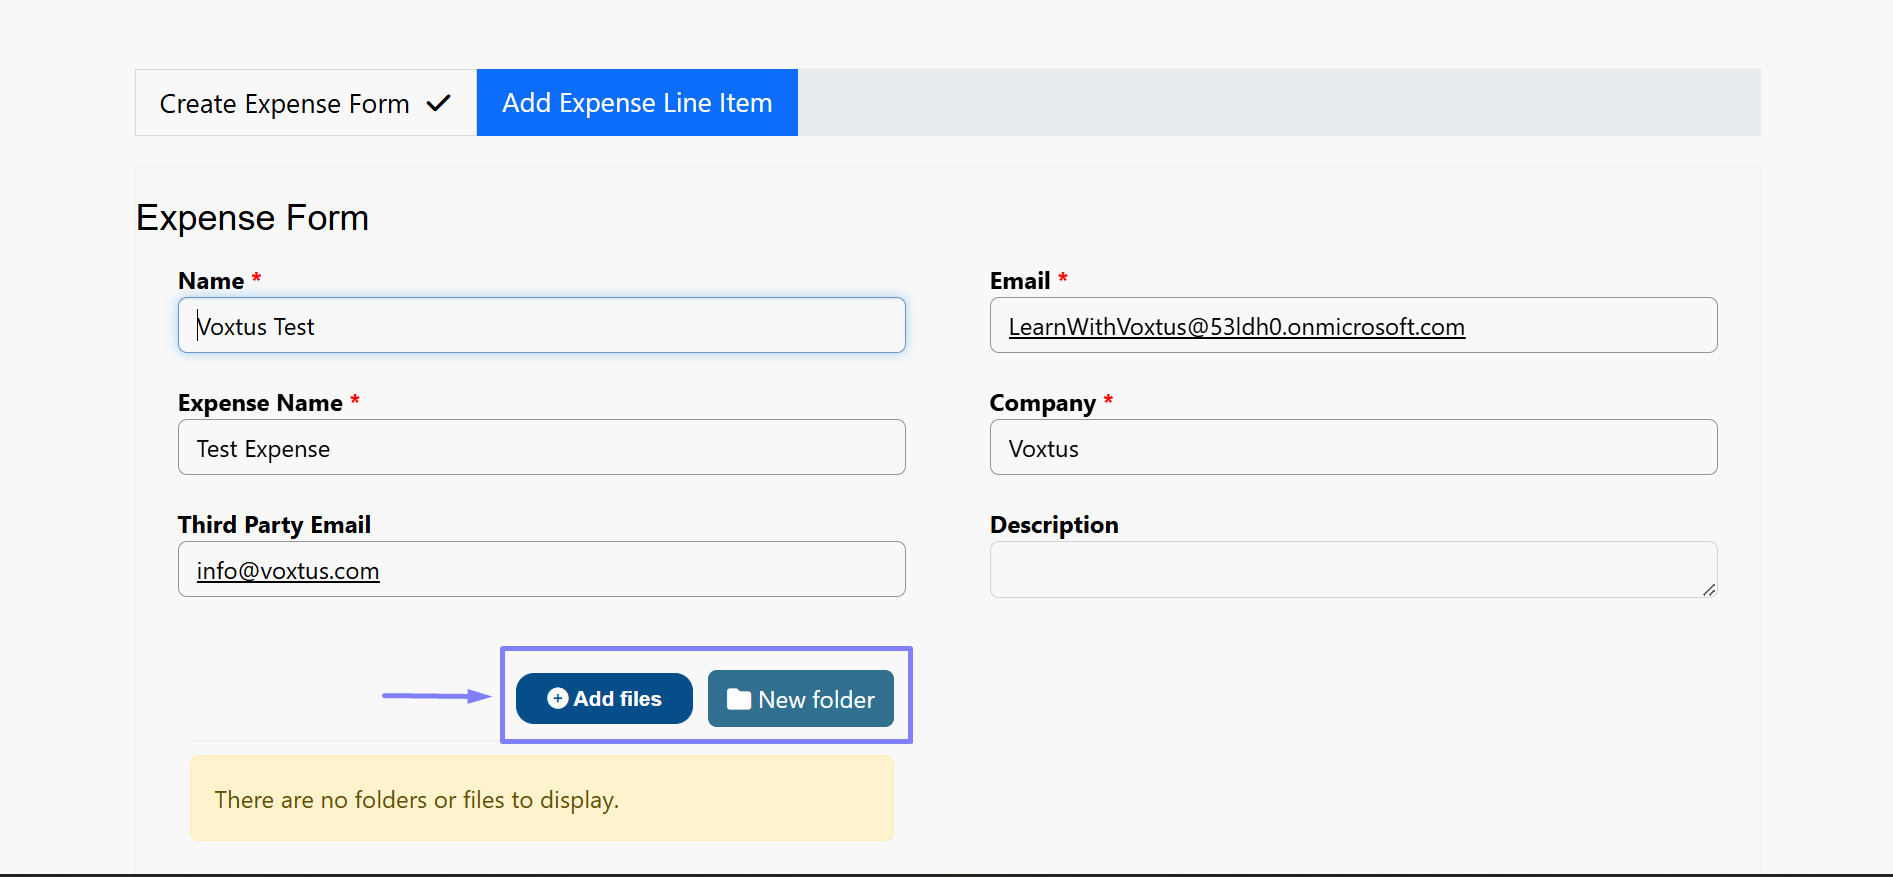
Step 1: Set Up Your SharePoint Site
The first step in enabling SharePoint integration is to create a dedicated SharePoint site:
Log in to SharePoint: Access your SharePoint account using your credentials.
Create a New Site:
- Navigate to the "Create Site" option.
- Choose between a Team Site or Communication Site based on your needs.
- Name your site appropriately (e.g., "Expense Management Files").
Note the URL: After the site is created, make a note of the SharePoint URL, as you will need it for configuration in Power Pages.

Creating a specific SharePoint site ensures that all uploaded documents are stored in a centralized and secure location, simplifying management and retrieval.
Step 2: Enable SharePoint Integration in Power Pages
To integrate your SharePoint site with Power Pages:
Access Power Platform Admin Center:
- Go to Power Platform Admin Center.
Select the Environment: On the left-hand menu, choose Environments and select the environment where your Power Pages site is hosted.

Navigate to Resources: Under Resources, select Power Pages sites.

Manage Your Site:
- Find your Power Pages site and click Manage.
- Scroll down to the Services section on the right-hand side.
- Toggle Enable SharePoint Integration to "Yes."

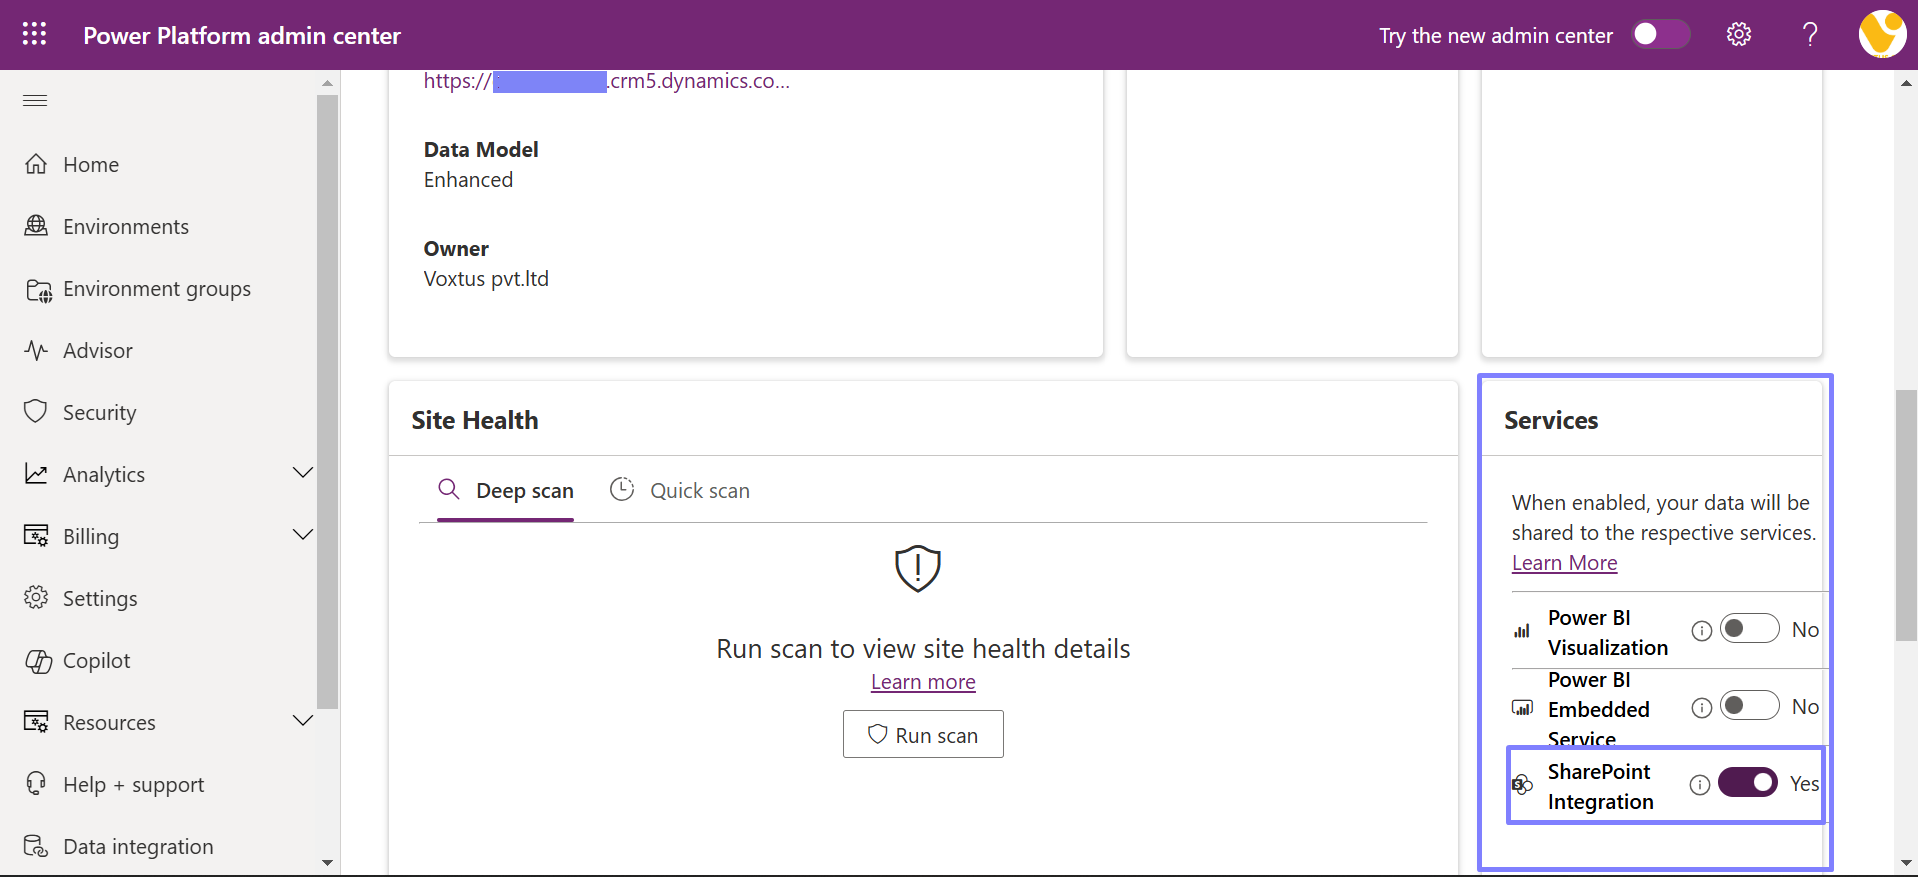
This step ensures that your Power Pages site is configured to use SharePoint for document storage and management.
Step 3: Configure Document Management for Your Table
To enable document management for your table and integrate it with SharePoint, follow these detailed steps:
Access Advanced Settings:
- Navigate to Settings > Advanced Settings in your Power Apps environment.

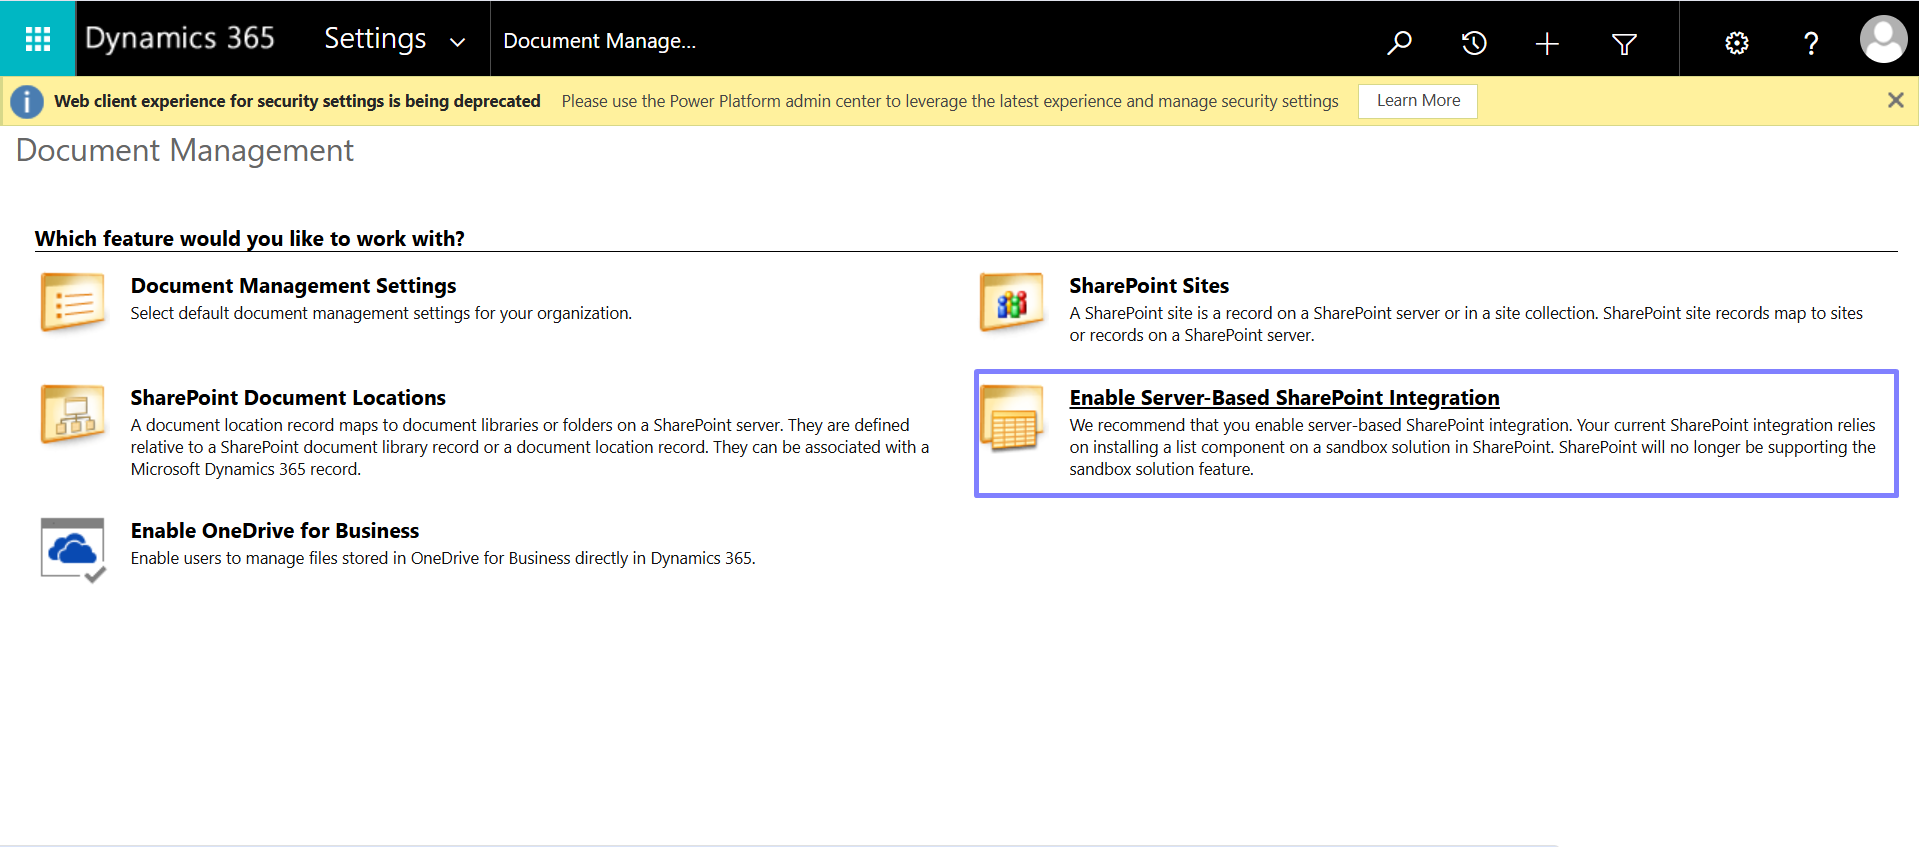
Enable Server-Based SharePoint Integration:
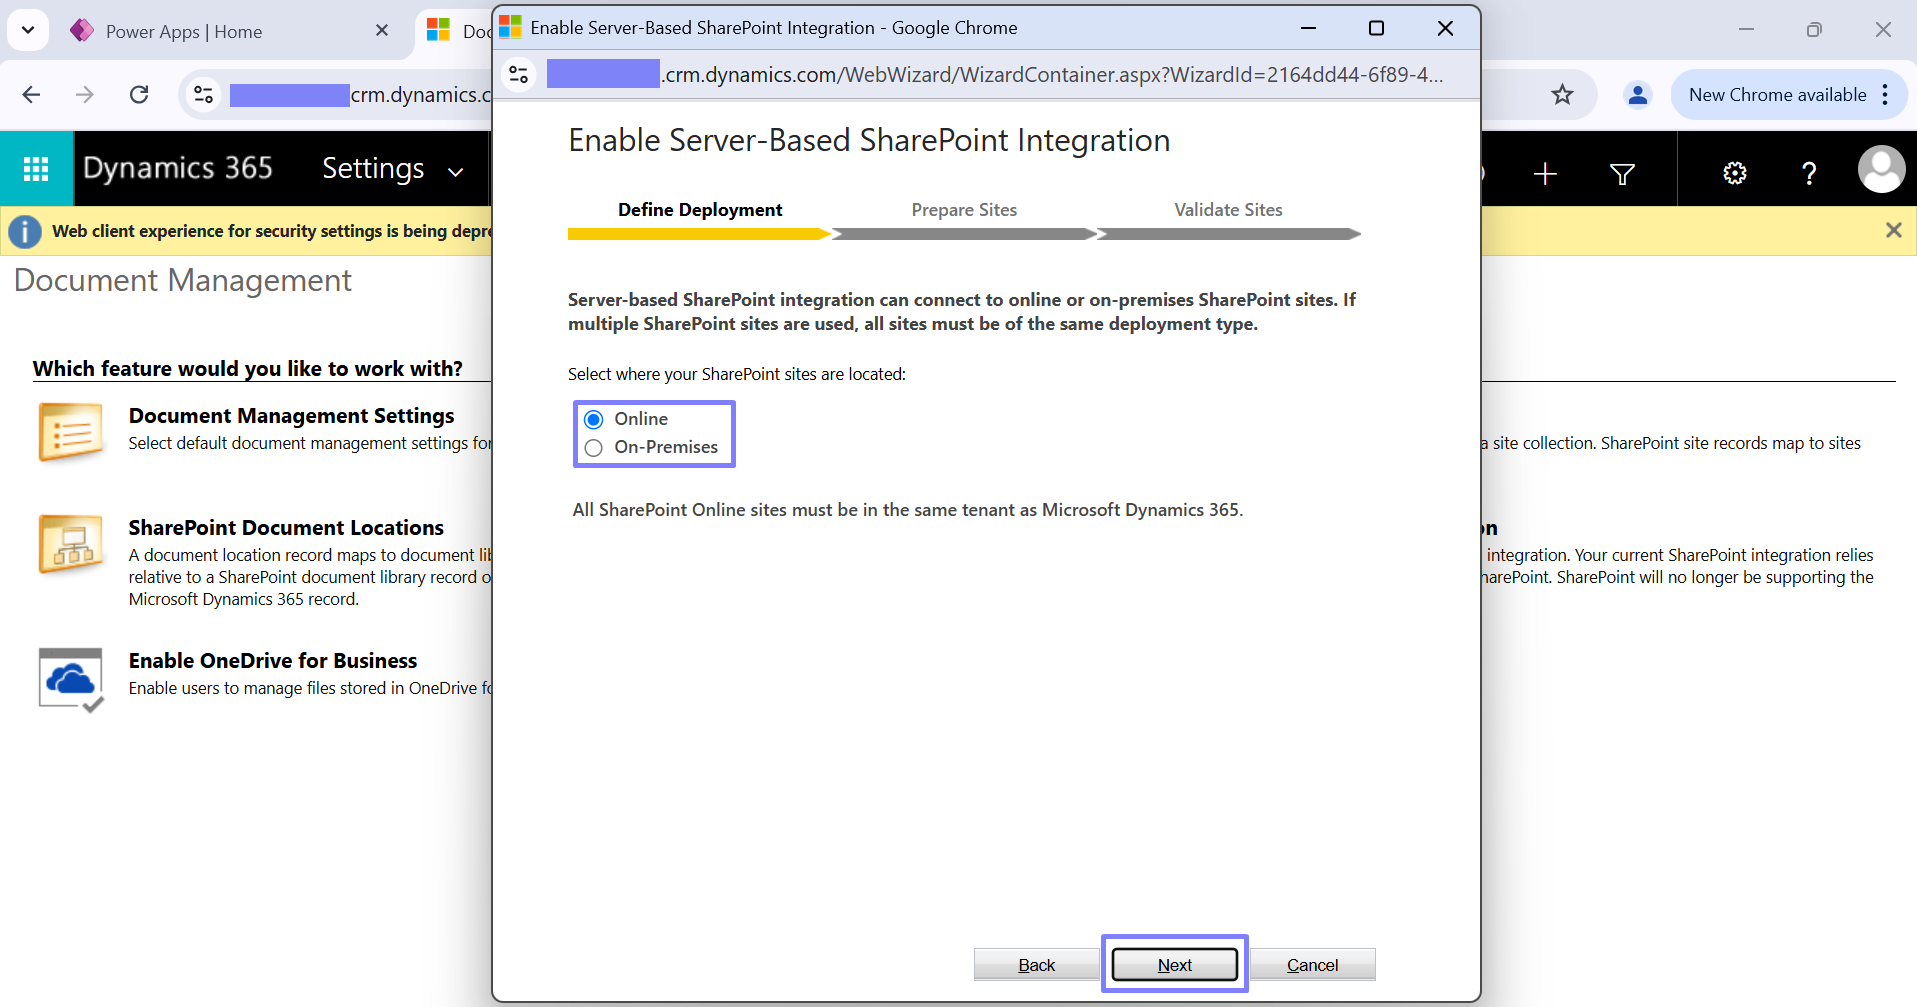
- Go to Document Management and select Enable Server-Based SharePoint Integration, then click Next to proceed
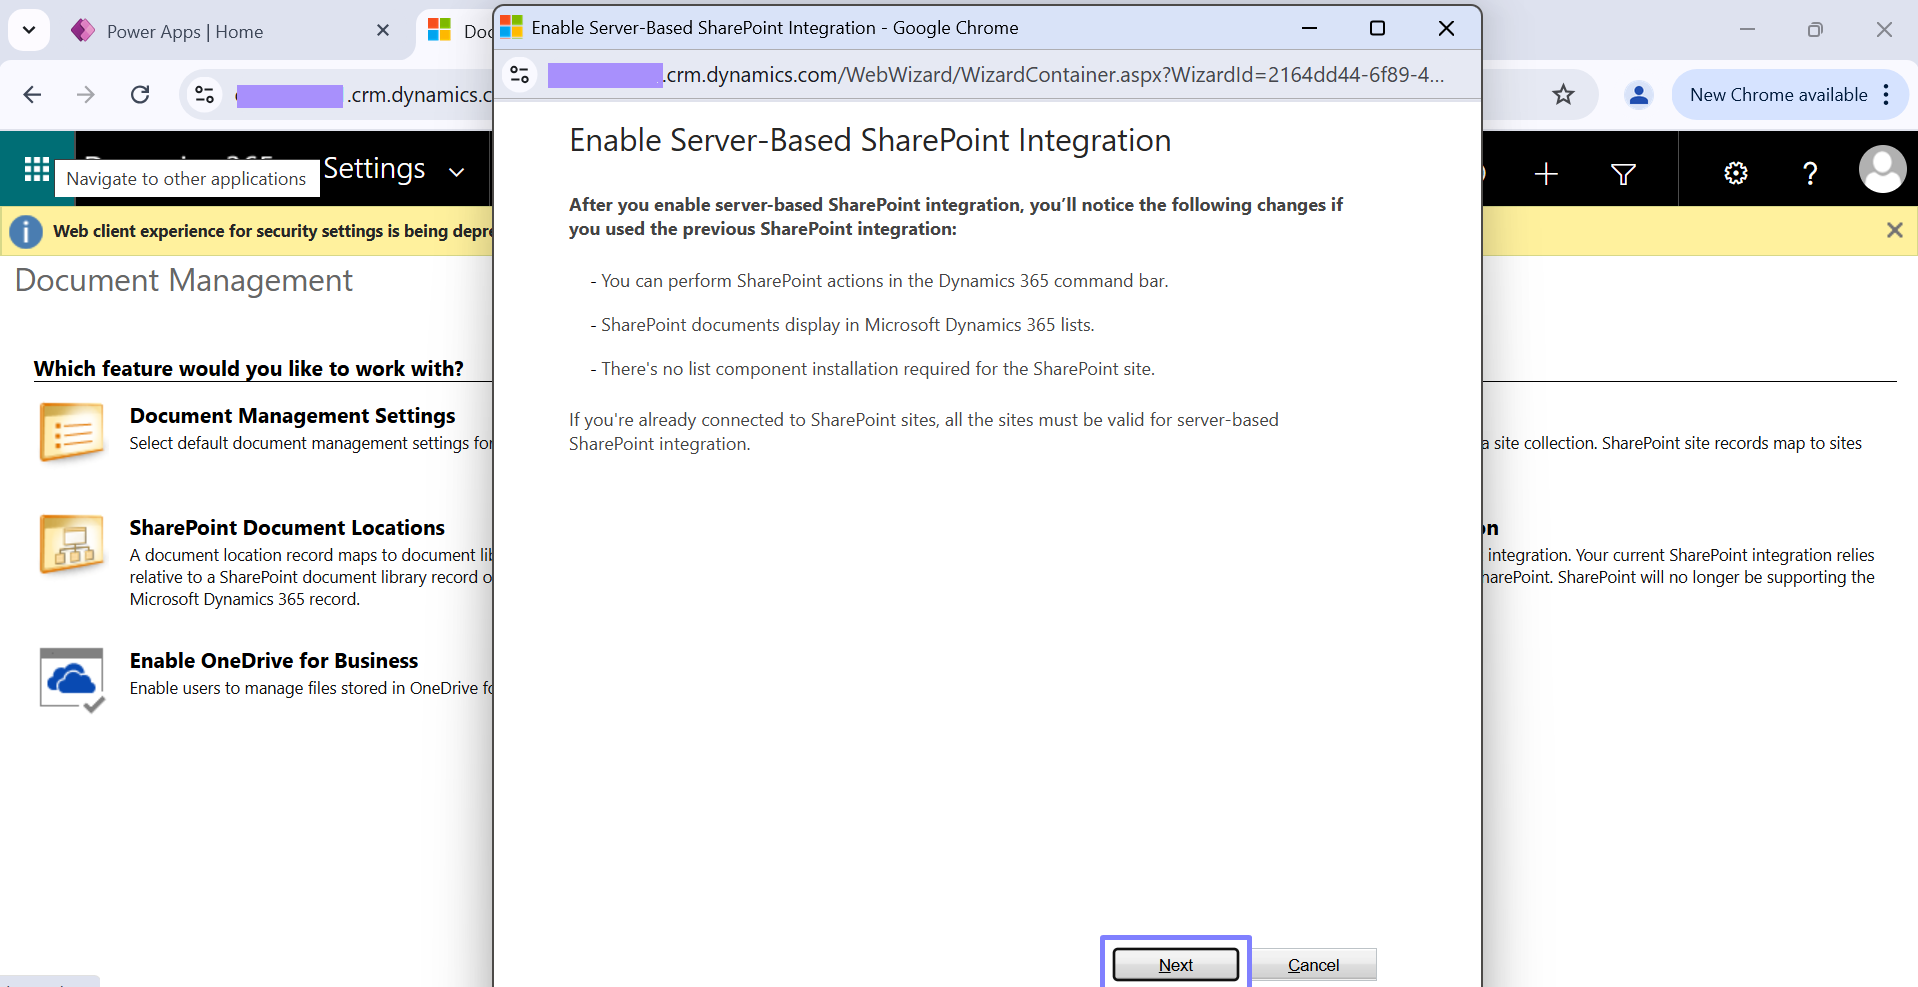
- Choose Online to indicate that your SharePoint sites are hosted online, Then click Next.
- Paste the URL of the SharePoint site you created earlier.
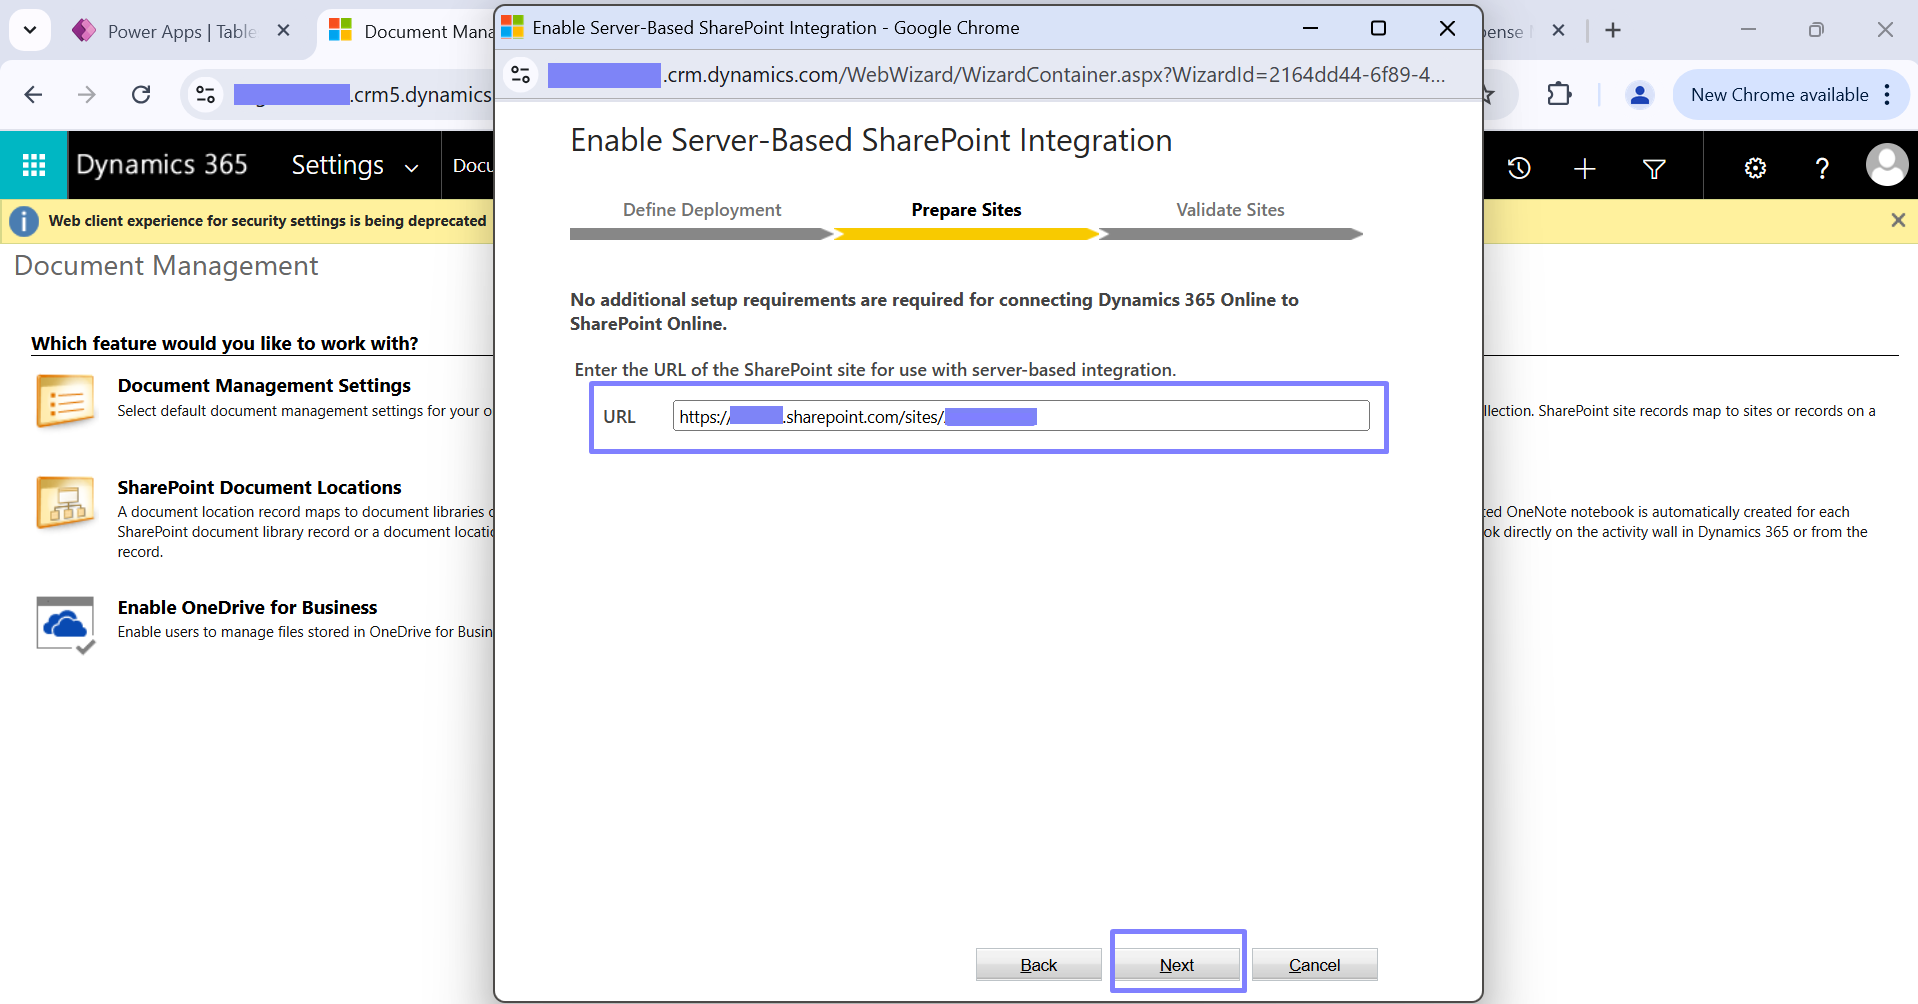
- Click Next to validate the URL. If the URL is valid, click Finish to complete this step.

Configure Document Management Settings:
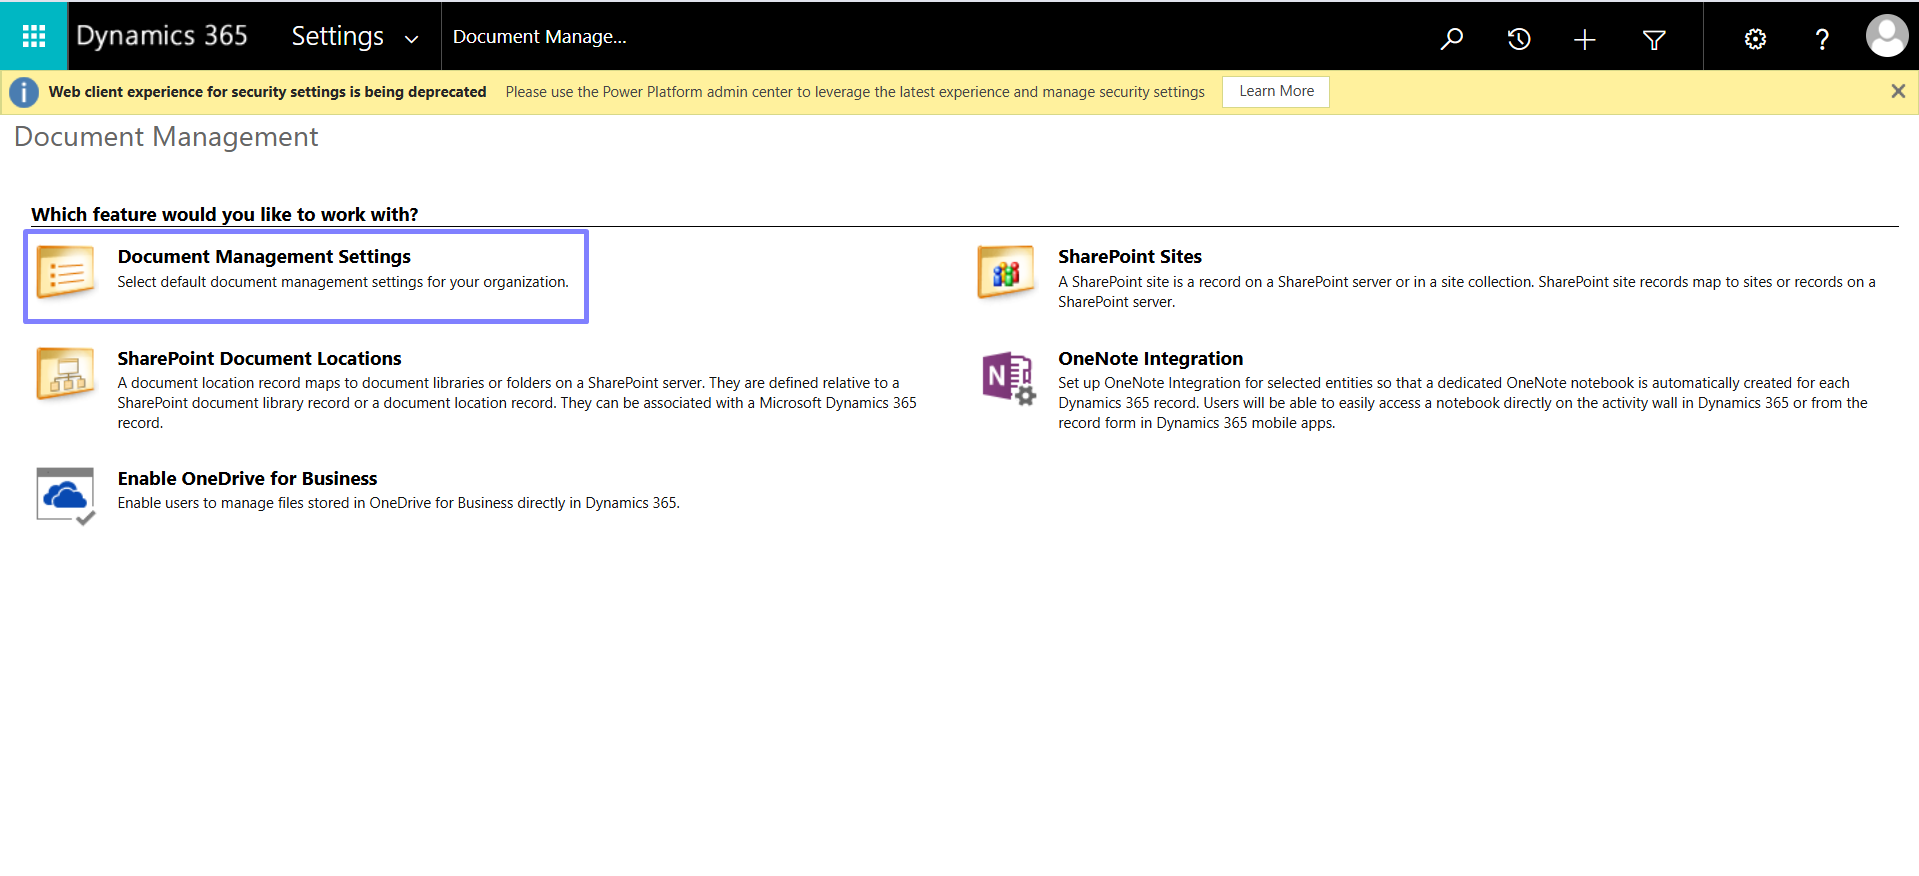
- After enabling SharePoint integration, select Document Management Settings.
- Add the SharePoint site URL again if required.
- Choose the table(s) you want to enable for document management (e.g., "Expense").
- Complete the configuration by saving your settings.
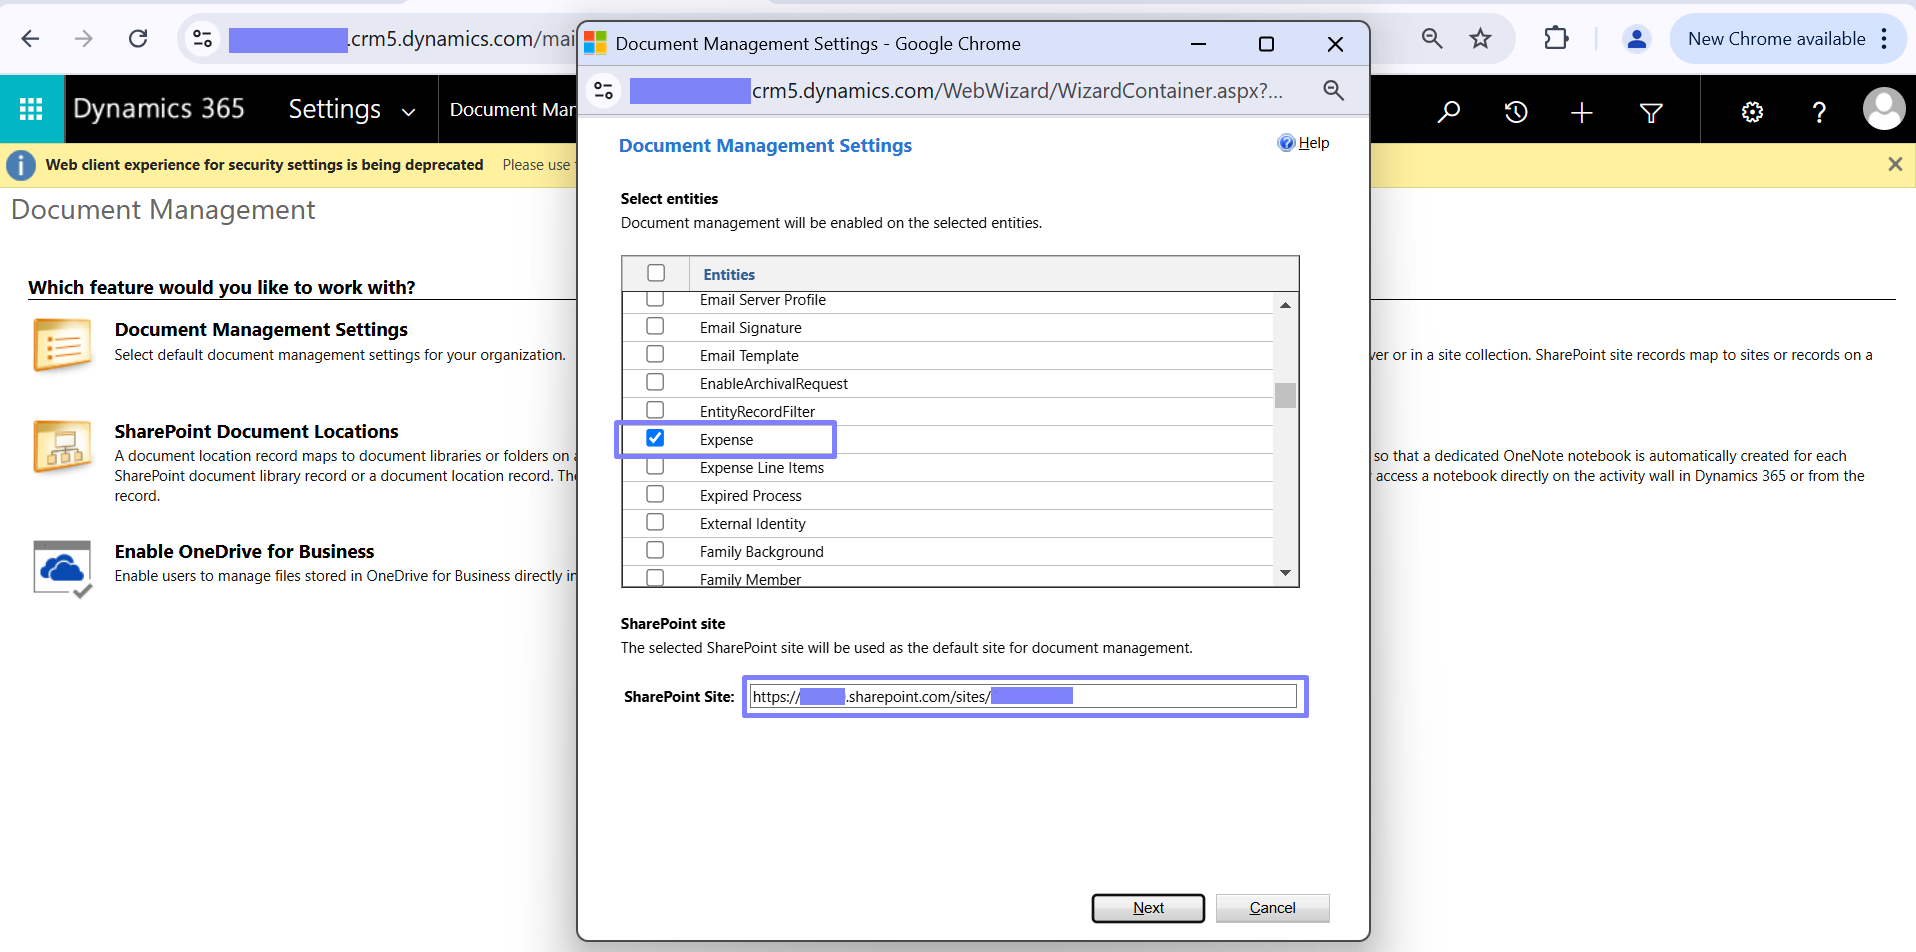

Enabling server-based SharePoint integration ensures that your Power Pages forms can securely interact with SharePoint for document storage and management.
Step 4: Add a Document Location Subgrid to Your Form
The document location subgrid provides users with a clear interface to manage uploaded files:
Edit Your Form:
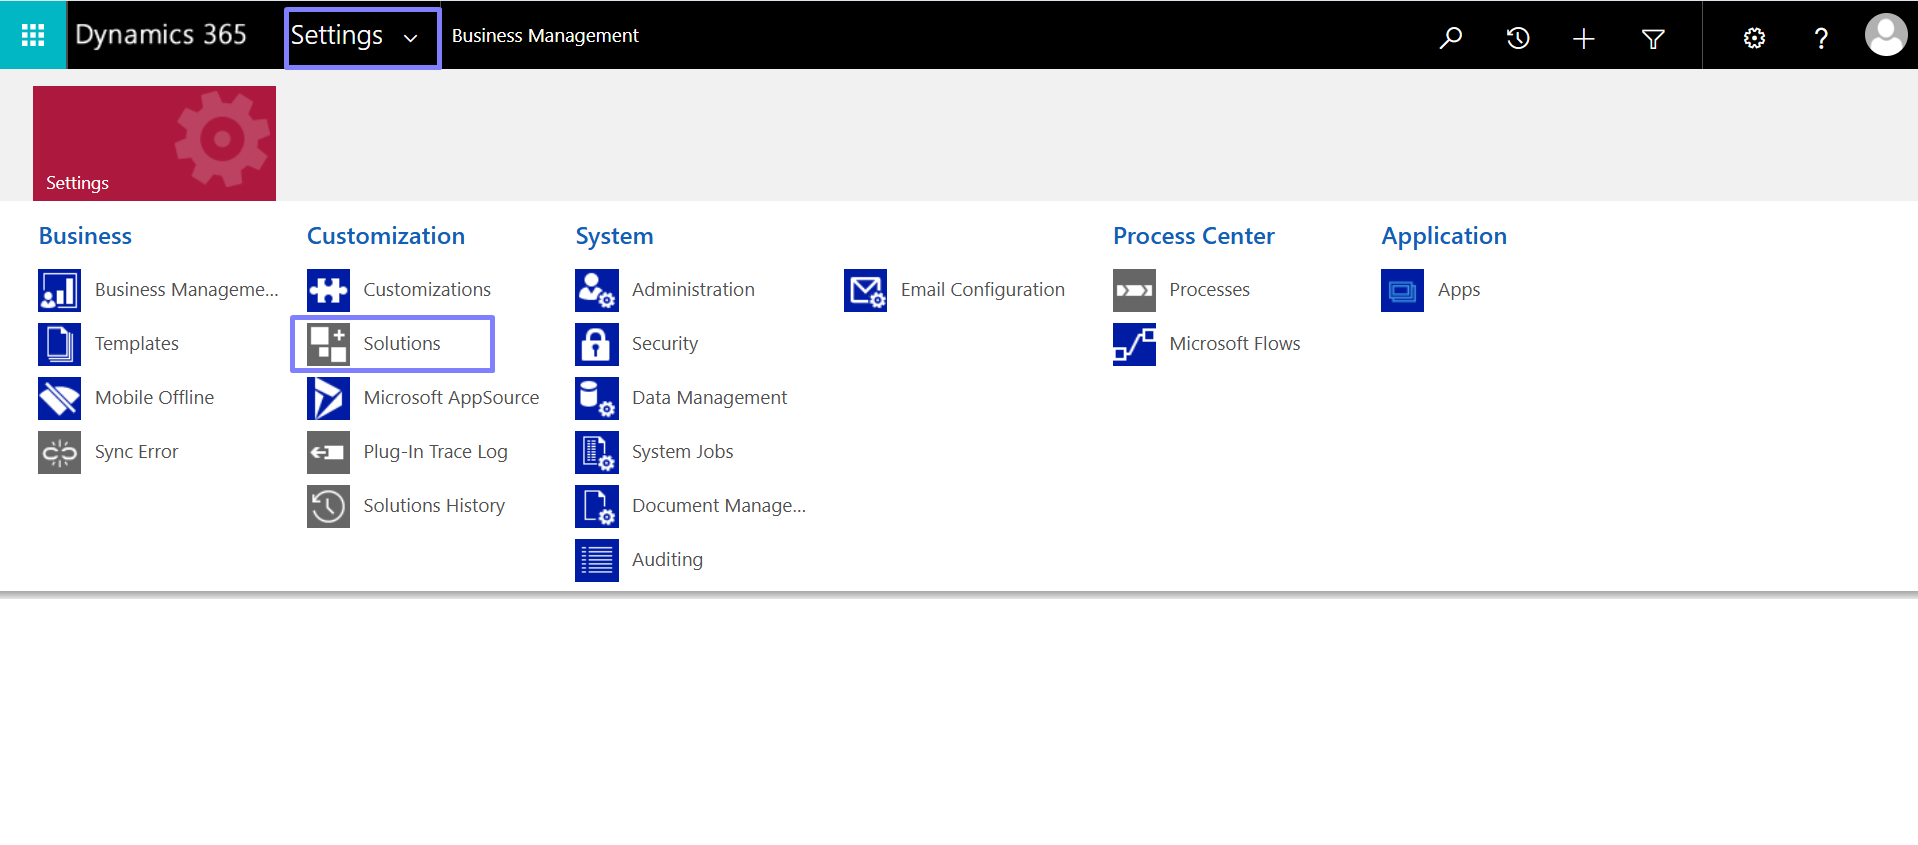
- Go to Advanced Settings > Solutions and select your solution.
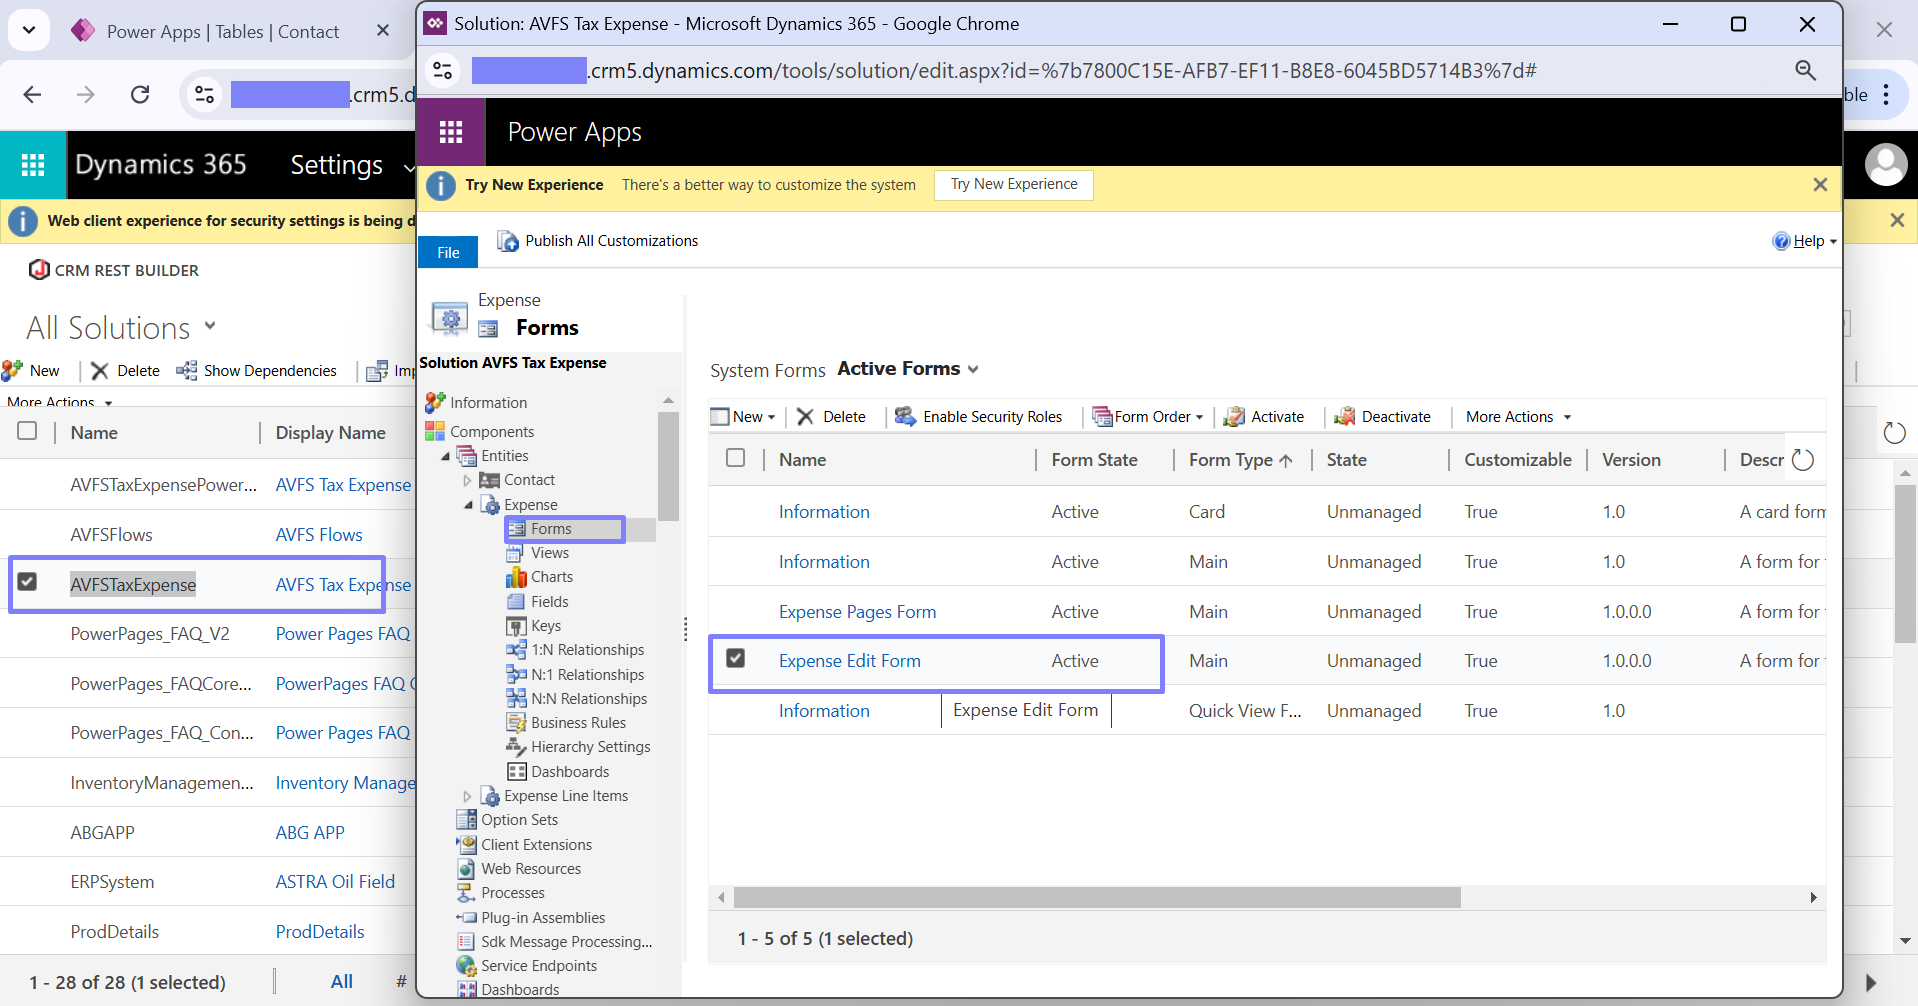
- Locate your table (e.g., "Expense") and choose the form you want to edit.
Insert a Section for Documents:
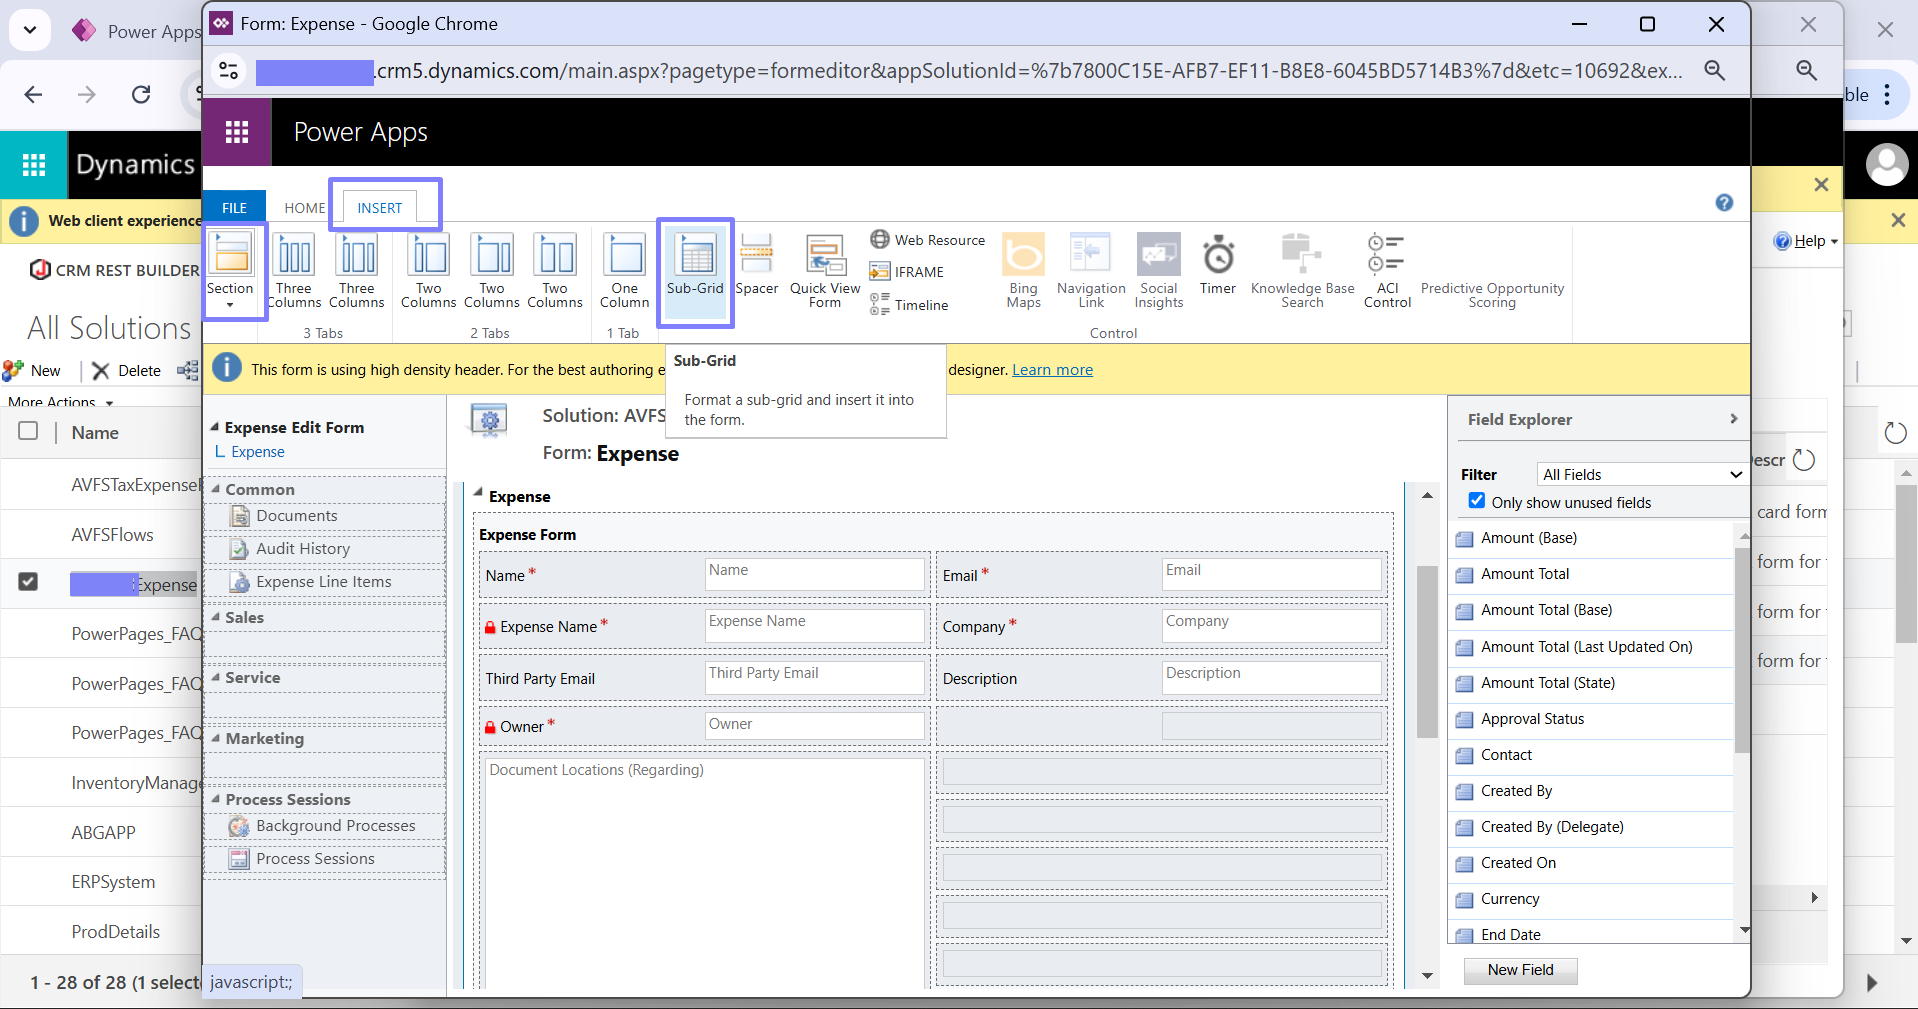
- In the form editor, click Insert > Section to add a new section where the subgrid will be placed.
Add a Subgrid:
- Inside the new section, insert a Subgrid.
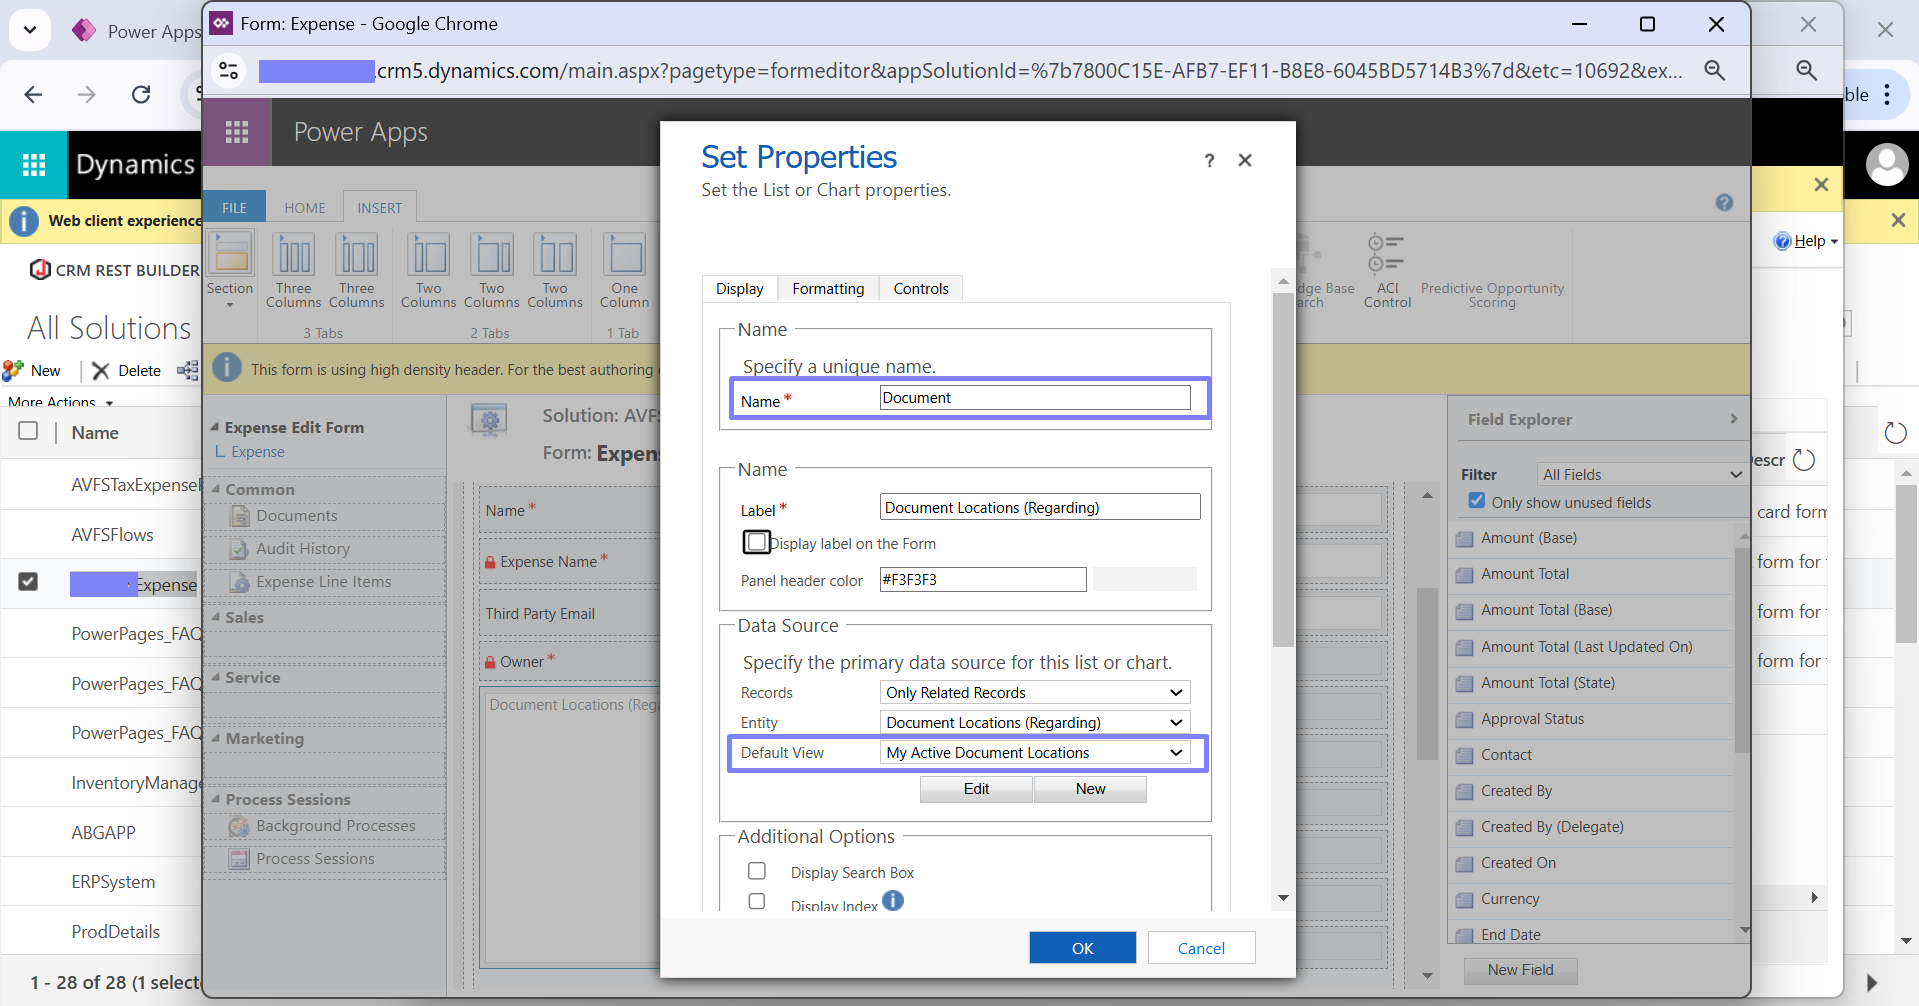
- Configure the subgrid to display Active Document Locations as the default view.
- Assign it a descriptive name, such as "Document Uploads."
Customize the Label:
- Add a user-friendly label to the subgrid for clarity (e.g., "Upload Supporting Documents").
Save and Publish: Save your changes, publish the form, and return to your solution.
Publish All Customizations: Ensure all customizations are published to make them active.
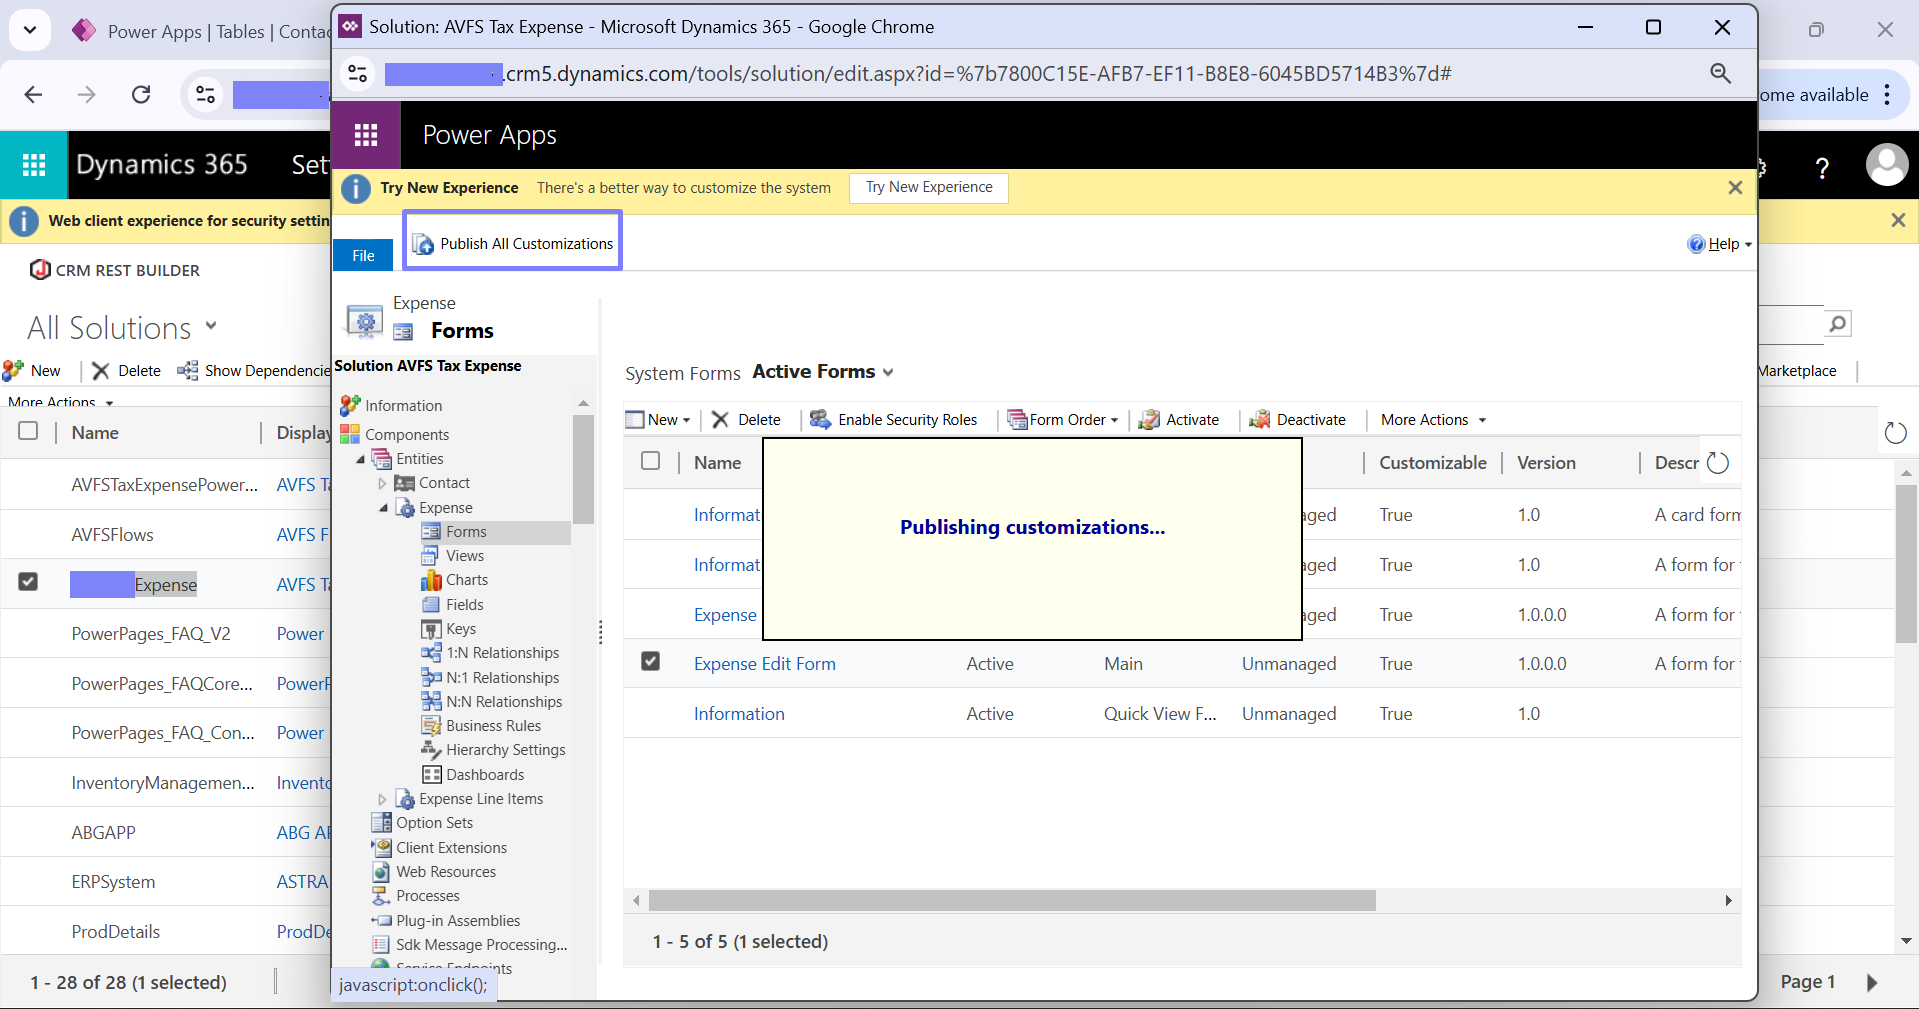
The subgrid enables users to view, upload, and manage documents linked to each record directly from the form.
Step 5: Set Up Table Permissions
Access Portal Management: Open Portal Management and navigate to Security > Table Permissions.
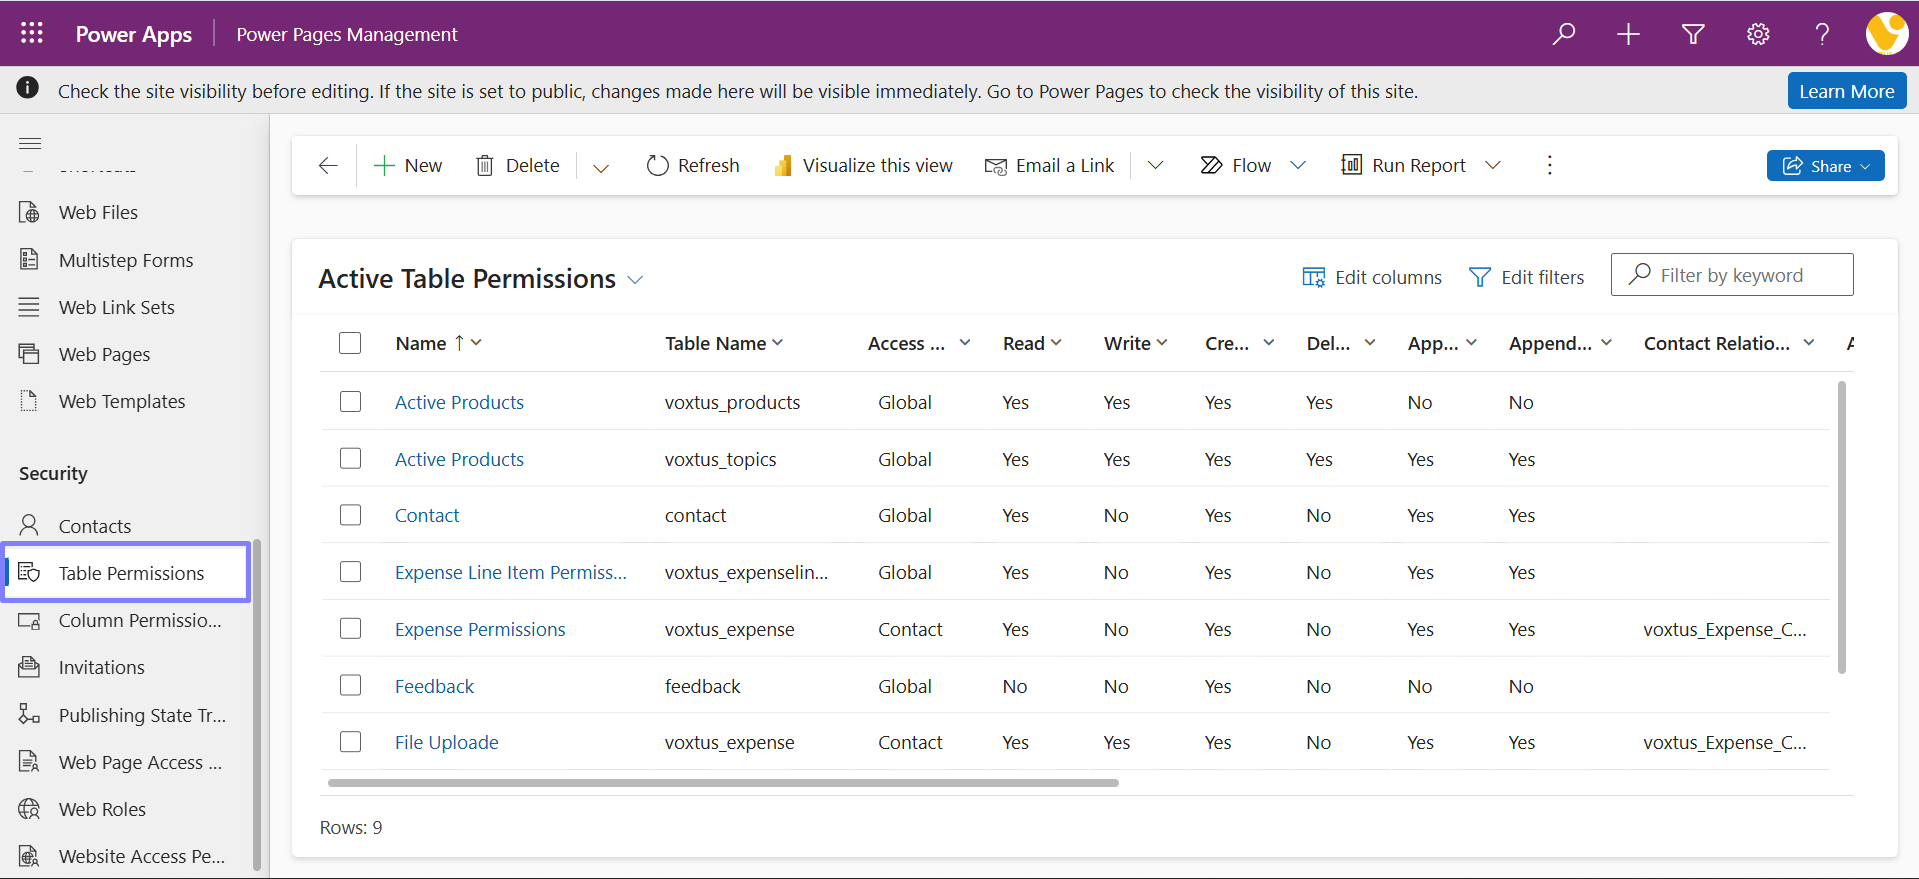
Create a Permission for File Uploads:
- Add a new permission named File Upload.
- Select the relevant table (e.g., "Expense").
- Choose your Power Pages site under Website.
- Set Access Type to Global.
- Add the required privileges (e.g., Create, Read, Write).
- Assign appropriate Web Roles to the permission.
- Save the permission.
Create a Permission for SharePoint Document Locations:
- Add another permission named File Upload SharePoint Document.
- Select the Document Location (SharePointDocumentLocation) table.
- Link it to the parent table using the Parent Relationship field.
- Set Access Type to Parent.
- Add privileges and save the permission.
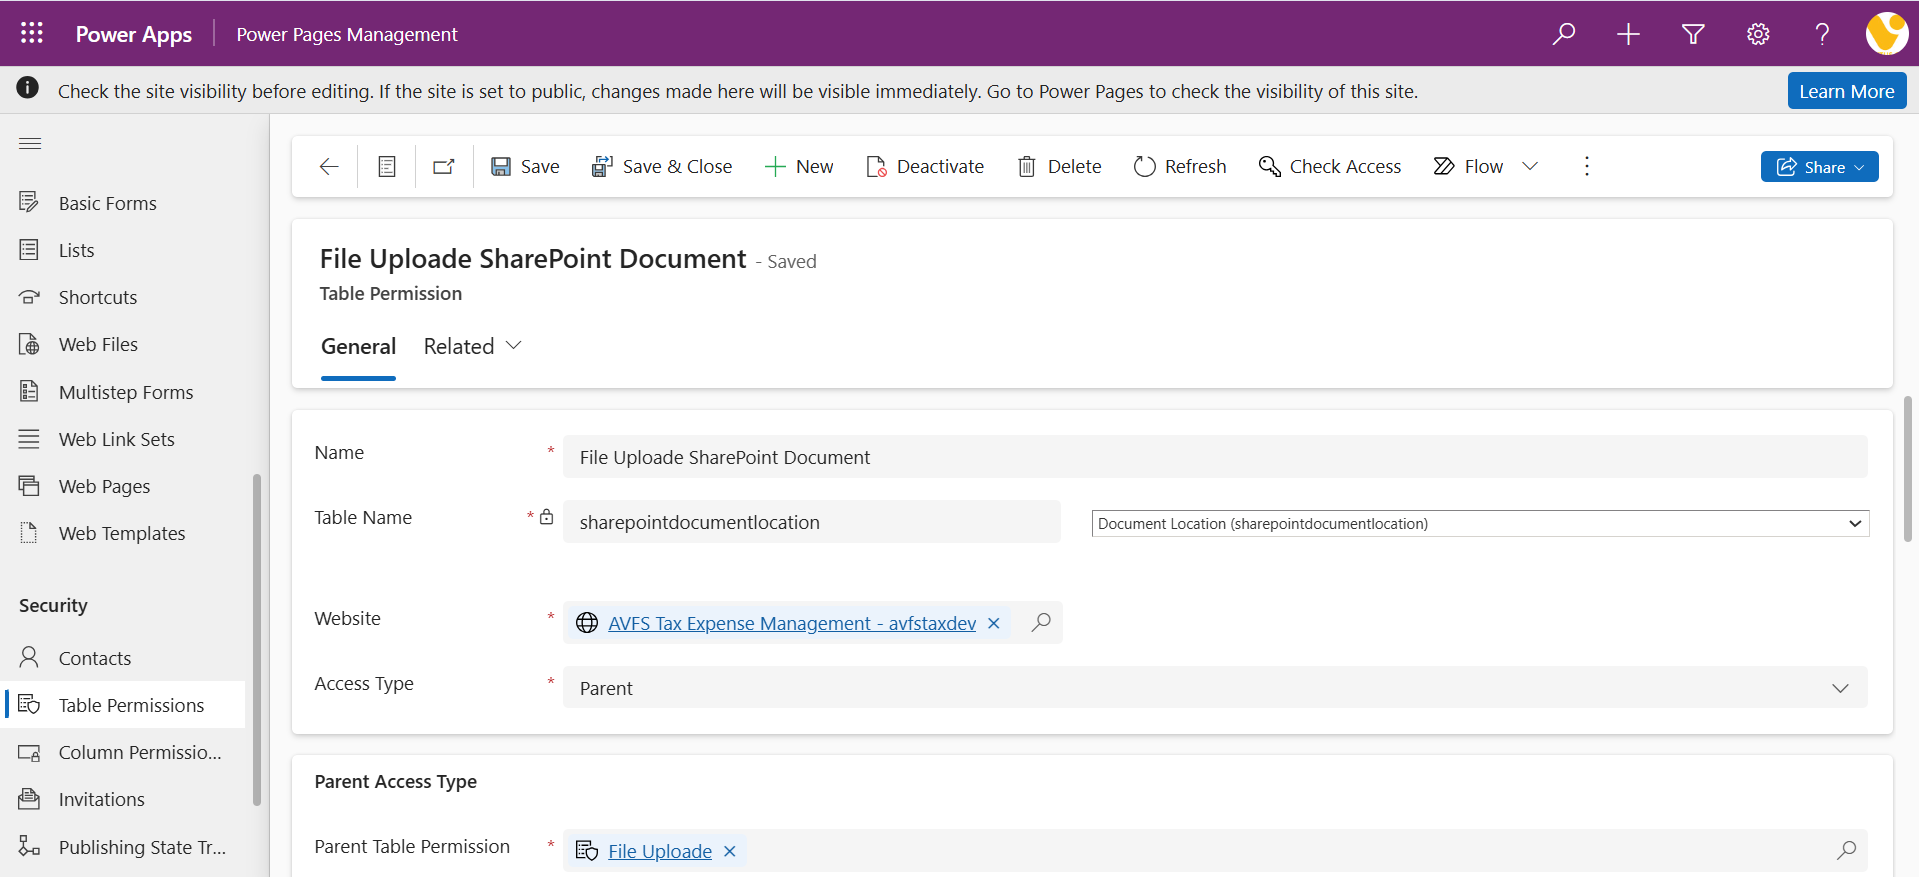
These permissions ensure that users can upload and view files securely based on their roles.
If you have any doubts or questions related to this blog, you can Contact us by Email: info@voxtus.com
Shivani Gusain
Power Platform Consultant
Ui Path Related Posts


