
Using Power Automate to Export Data to Excel from SharePoint
Automating business processes has never been easier through Power Automate, especially when you work with SharePoint lists and Excel. In this blog, we’ll walk through how we can export data out from a SharePoint list to an Excel file by the usage of Power Automate, also we'll email that Excel file as an attachment.

Let us explore the building of this flow in a step-by-step manner, with the Excel file being stored in a SharePoint document library and our SharePoint list being named “Cab_Booking_Tbl”.

Step-by-Step Flow Setup

Step 1: Trigger Your Flow
Start a fresh flow after opening Power Automate first. Any trigger is something on which you can depend that depends on your requirement. The Recurrence trigger is intended for the use of recurring automation.
In our example, we’re using with the Recurrence trigger. Since we use it, the flow runs on a schedule.

Step 2: Get Items from SharePoint
Add the “Get items” action.
- Site Address:You must choose your address.
- List Name: Select your SharePoint list (Cab Booking tbl).
- Filter Query (Optional): If you want to filter the results, add your OData query here.

This action will fetch the list items you want to export.
Step 3: Run Office Script on Excel
Use the “Run Script” action to initialize your Excel file. This step assumes you have:.
- Created an Excel file in a SharePoint document library.
- Defined a named table in the Excel workbook.
- Created an Office Script in Excel to prepare or clear the table if needed.

Configure:
- Location: OneDrive or SharePoint.
- Document Library: Where the Excel file is stored.
- File: Path to the Excel file.
- Script: Select the script you've written in Excel.
Step 4: Apply to Each – Add Row to Table
Use the Apply to each control to loop through the SharePoint list items.
- Input: Use the dynamic value from the “Get items” step. Add “Value” from Dynamic Value.
-
Inside the loop, add “Add a row into a table” action
- Location: Same as above.
- Document Library
- File
- Table: The table name inside the Excel file.
- Row Values: Map your list columns to Excel columns.

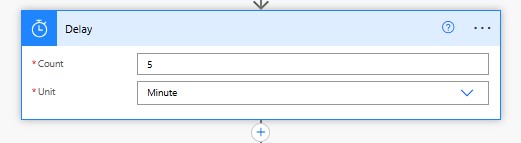
Step 5: Add Delay
To ensure the Excel file updates are completed before we download it:
- Add the “Delay” action.
- Set it to 5 minutes.
This is especially useful when dealing with large lists or many rows.
Step 6: Get File Content
Add the “Get file content” action to retrieve the generated Excel file.
- Site Address: Your SharePoint site.
- File Identifier: Use the file path to the Excel file.
This will give you the file content needed for the email attachment.

Step 7: Send Email with Attachment
Finally, add the “Send an email (V2)” action.
- To: Recipient’s email address.
- Subject: Email subject line.
- Body: Custom message body.
- Attachment Name: Provide the Excel filename (e.g., CabBookingExport.xlsx).
- Attachment Content: Use File Content from the “Get file content” step.

If you have any doubts or questions related to this blog, you can Contact us by Email: info@voxtus.com
Himanshu Nautiyal
Power Automate Consultant