Create a Zoom meeting via Power Automate
Step 1: Create a Shared Booking Page
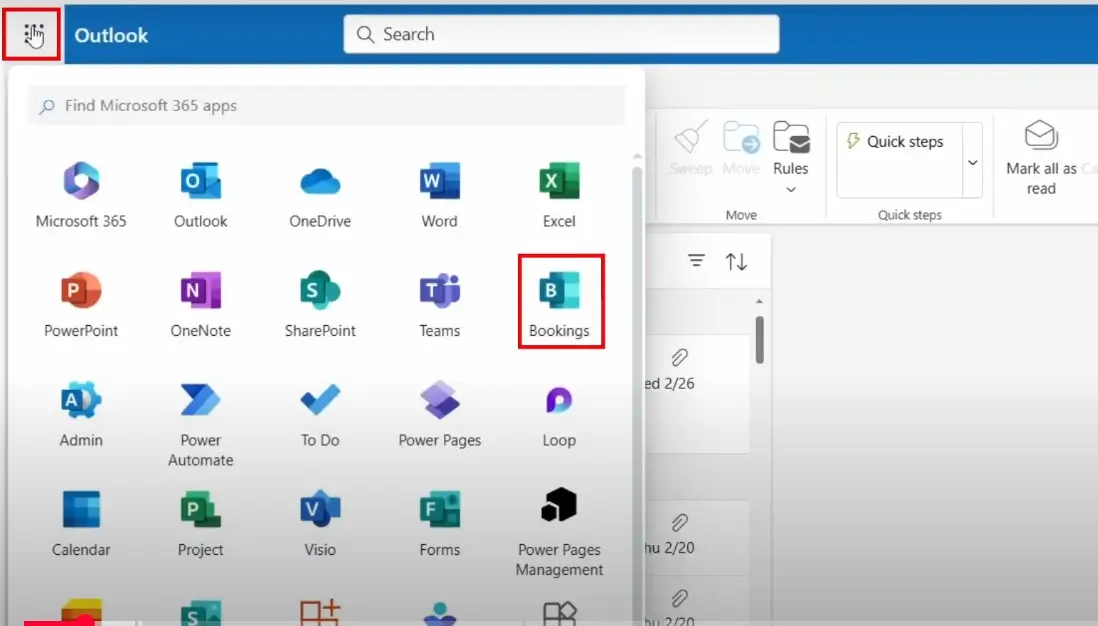
- Click on the nine dots of the outlook page and then click on the “Bookings”. This will redirect to the Microsoft Bookings.
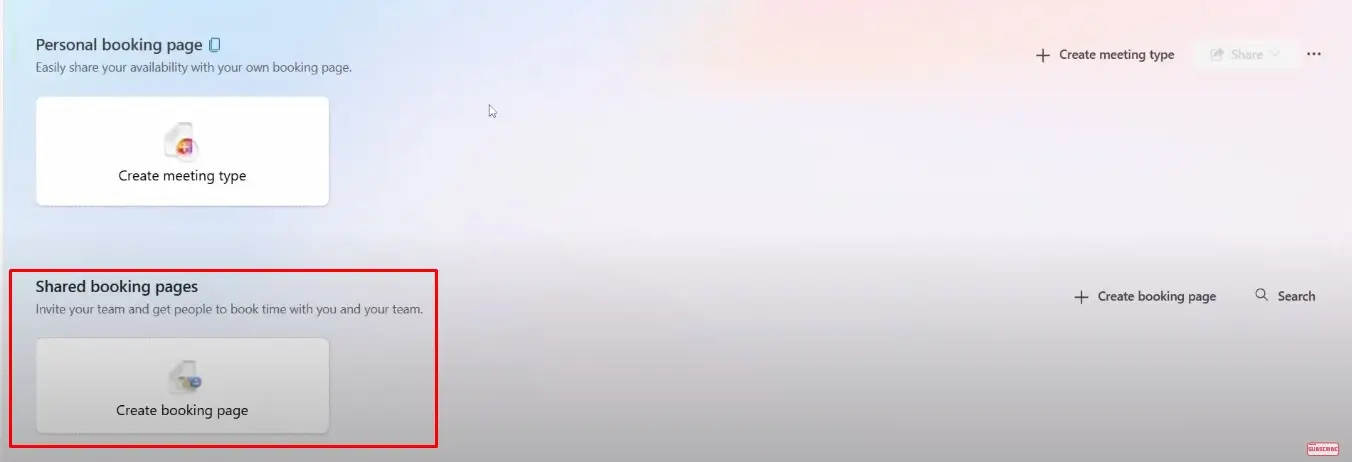
- There are two options for creating booking, Personal booking page & Share booking pages. Click on the “Shared booking pages”.
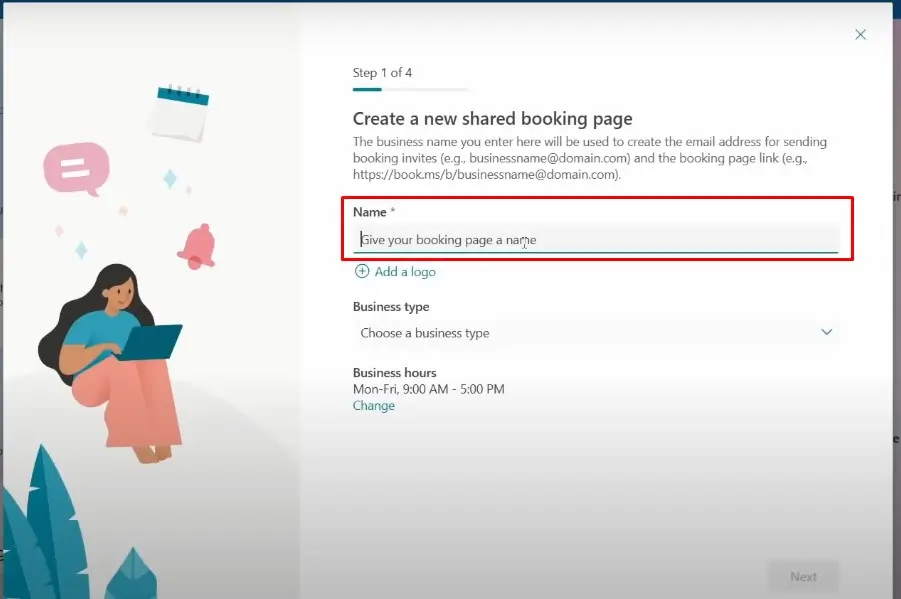
- Name the Page:
- Enter a unique **Name** (e.g., "VJ Test").
- Add a Logo (Optional):
- Upload a logo for branding (e.g., company logo).
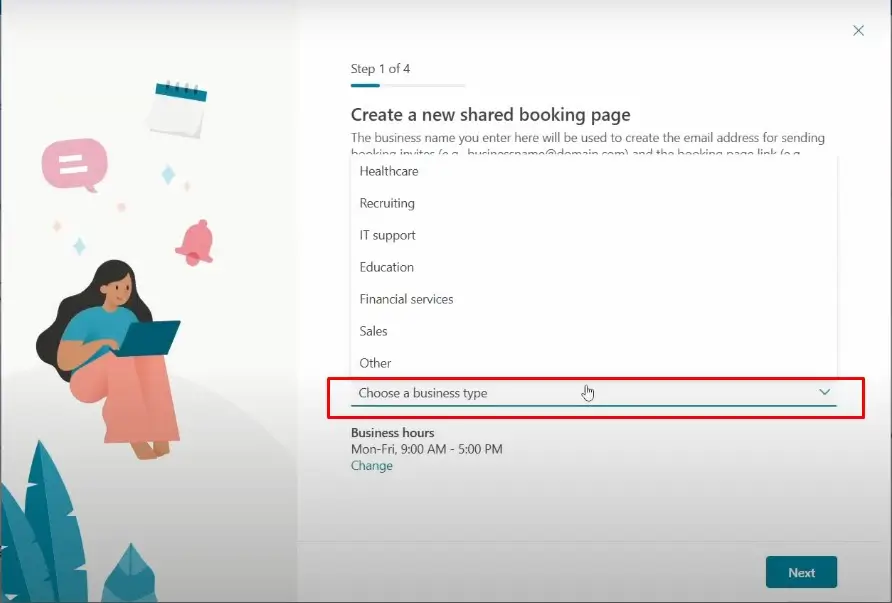
- Select Business Type:
- Choose from predefined categories like *IT support*, *Education*, or *Other*.
- Set Business Hours:
Default: Mon-Fri, 9:00 AM – 5:00 PM. Click **Change** to customize.
- Click **Next** to proceed.
Invite Staff
- Invite Team Members:
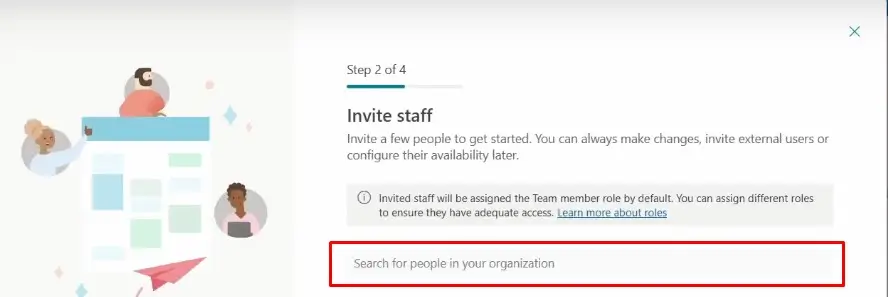
Search for staff within your organization.
- Assign roles (default: *Team Member*). External users can be added later.
Click –Next- to continue.
Set Up Services
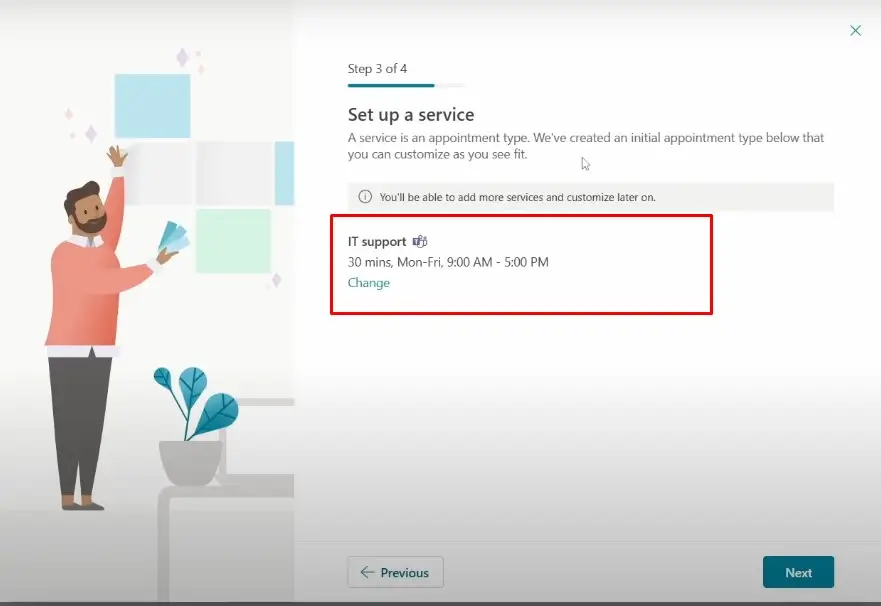
- Define Appointment Types:
- A default service (e.g., *IT support, 30 mins*) is pre-created.
Modify duration, availability, or description.
- Customize Later:
- Add more services post-setup (e.g., *Consultation*, *Training*).
- Click -Next- to advance.
Configure Access Permissions
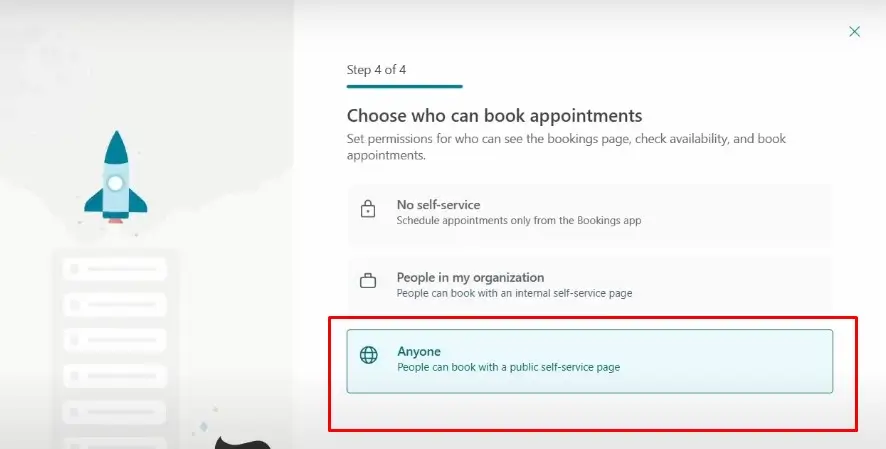
**Choose Audience**:
- **No self-service**: Bookings managed internally.
- **People in my organization**: Internal self-service page.
- **Anyone**: Public page (default for external users).
Click **Finish** to publish the booking page.
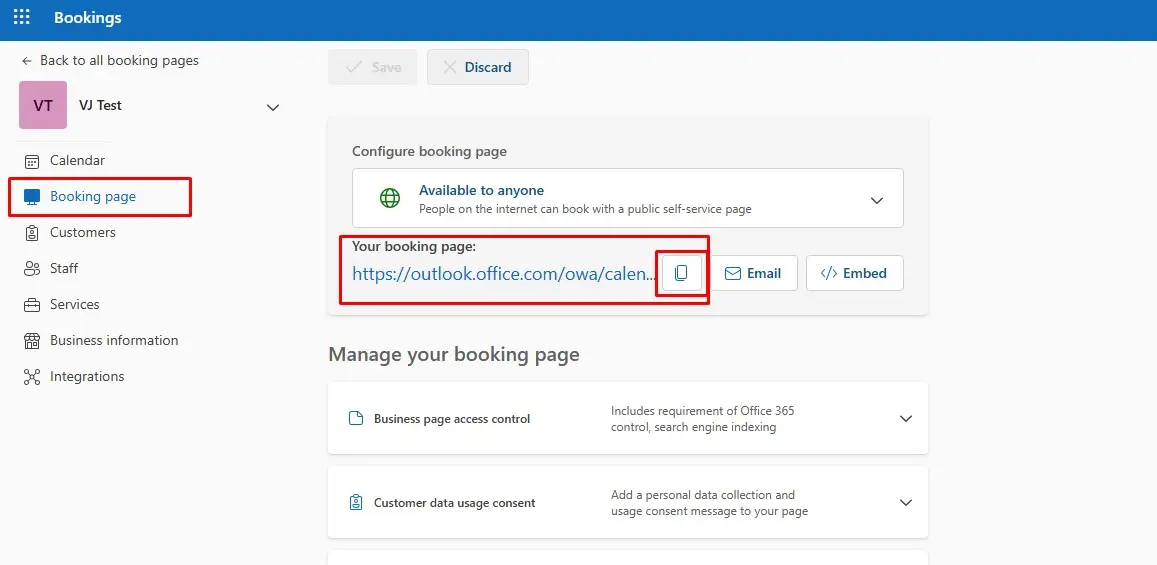
- Copy the link and paste in new tab for creating “Bookings”
**Add User Input Fields**:
- Require details like name, email, phone, and special requests.
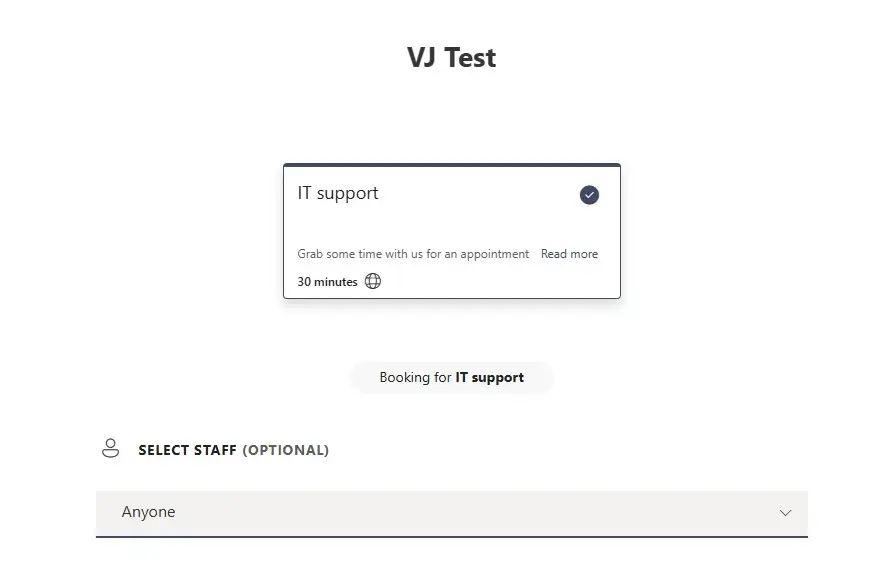
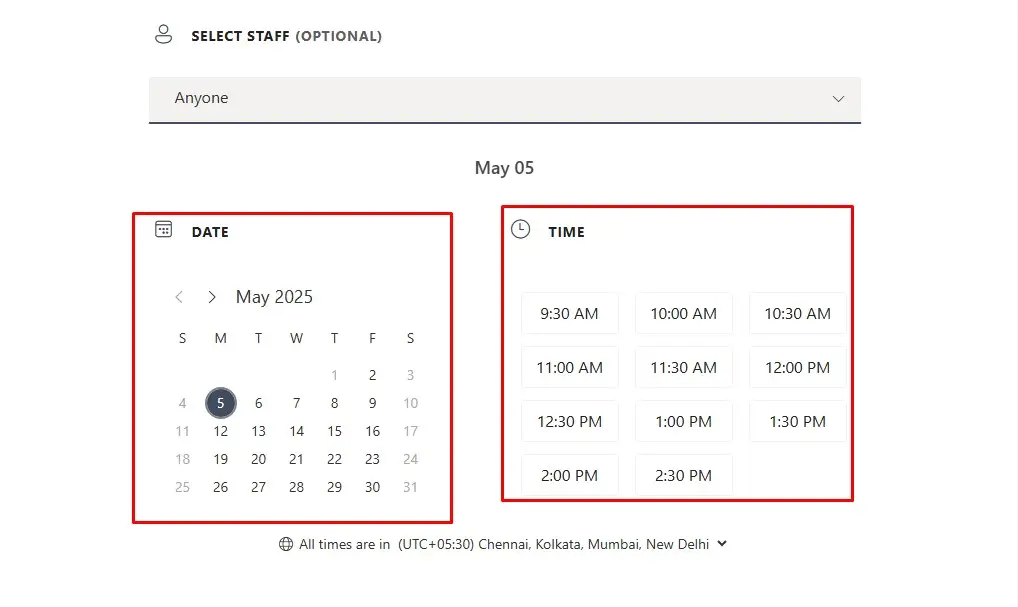
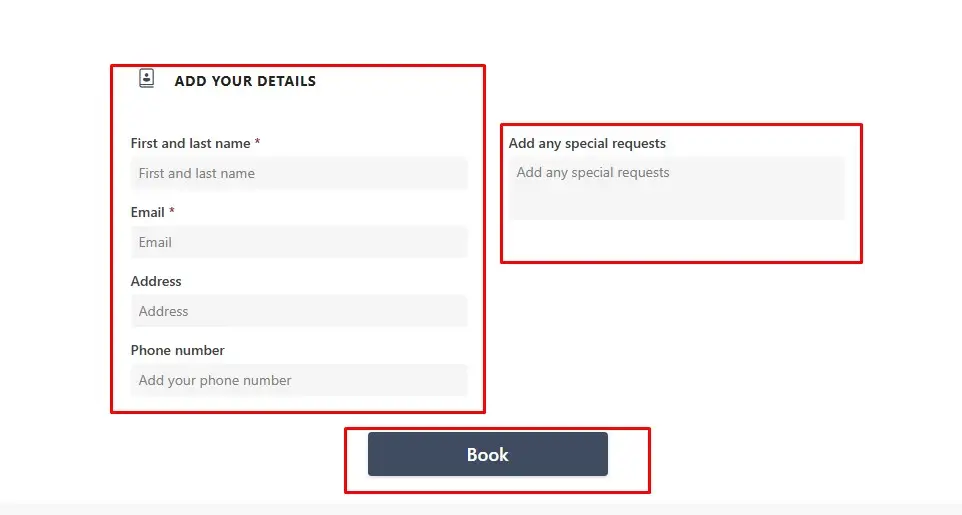
Preview and Test
**Check Availability**:
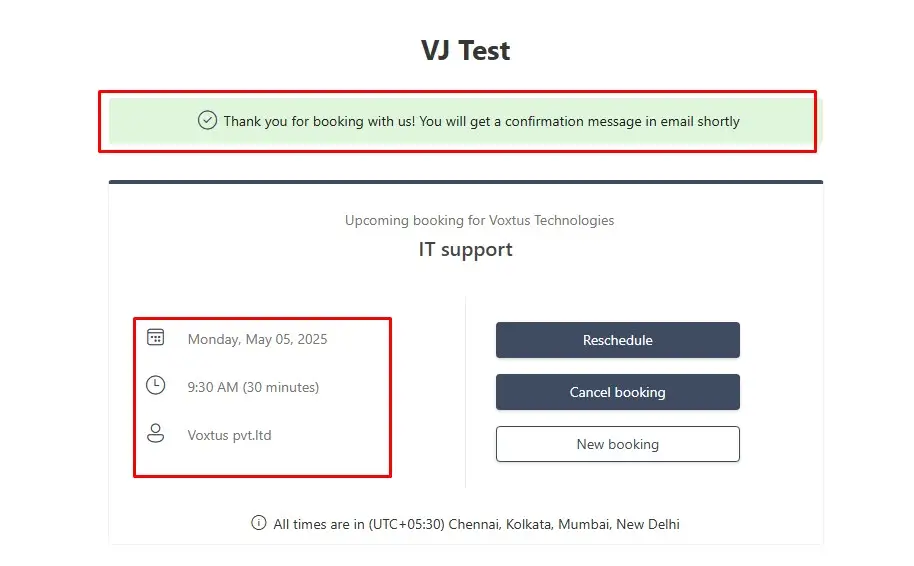
Step 2: Create a Zoom App for API Access
1.Go to Zoom Marketplace: https://marketplace.zoom.us/
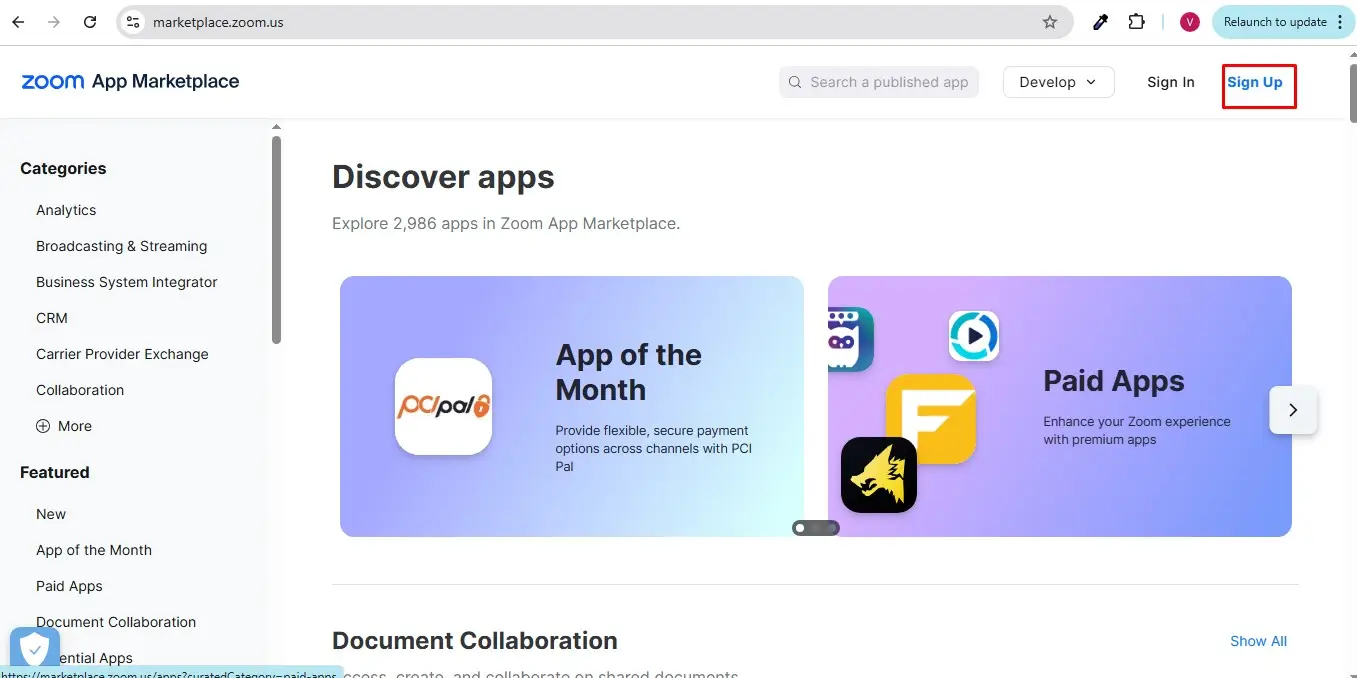
2. Sign In with your Zoom admin account.
3. Click on "Develop" > "Build App".
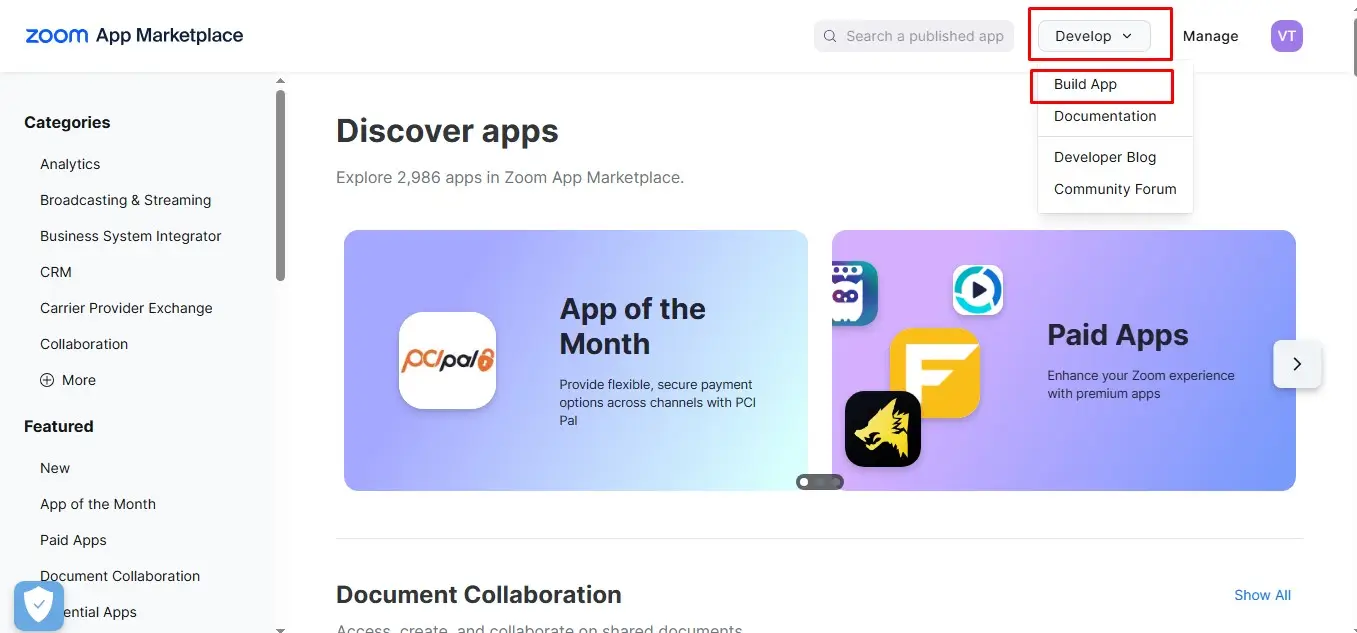
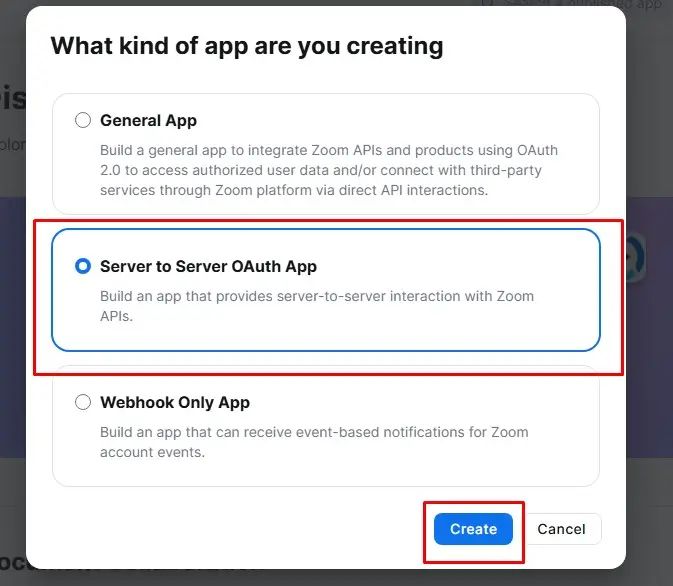
4. Select App Type:
- Choose "Server-to-Server OAuth App" (recommended for automation).
- Click "Create".
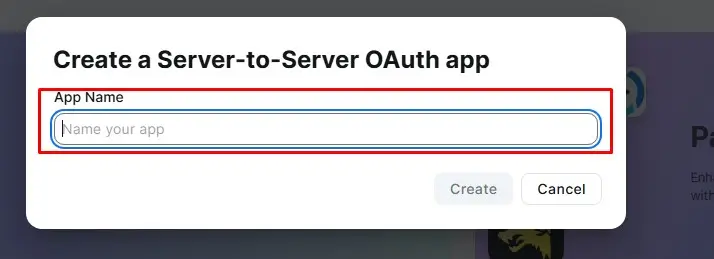
Configure the Server-to-Server OAuth App
1. App Name: Provide a meaningful name.
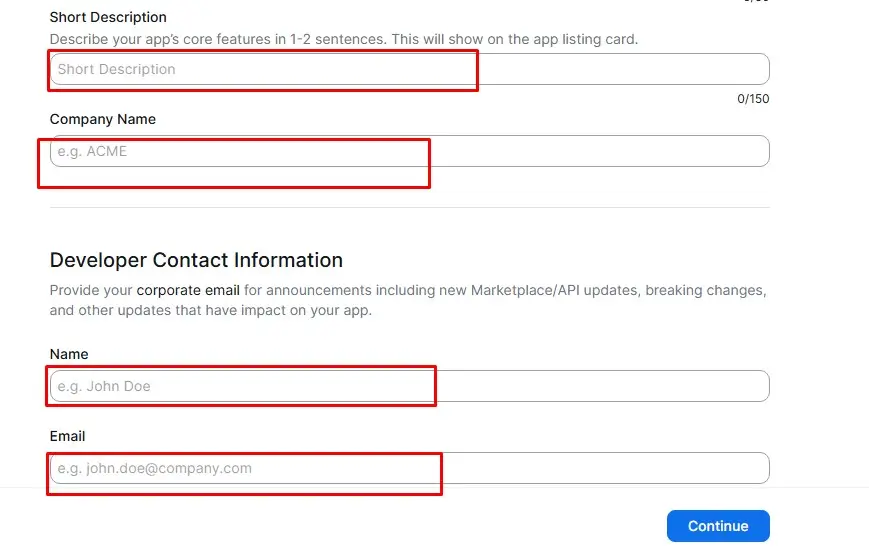
2. Information: Fill in required fields (developer contact, company name, etc.)..
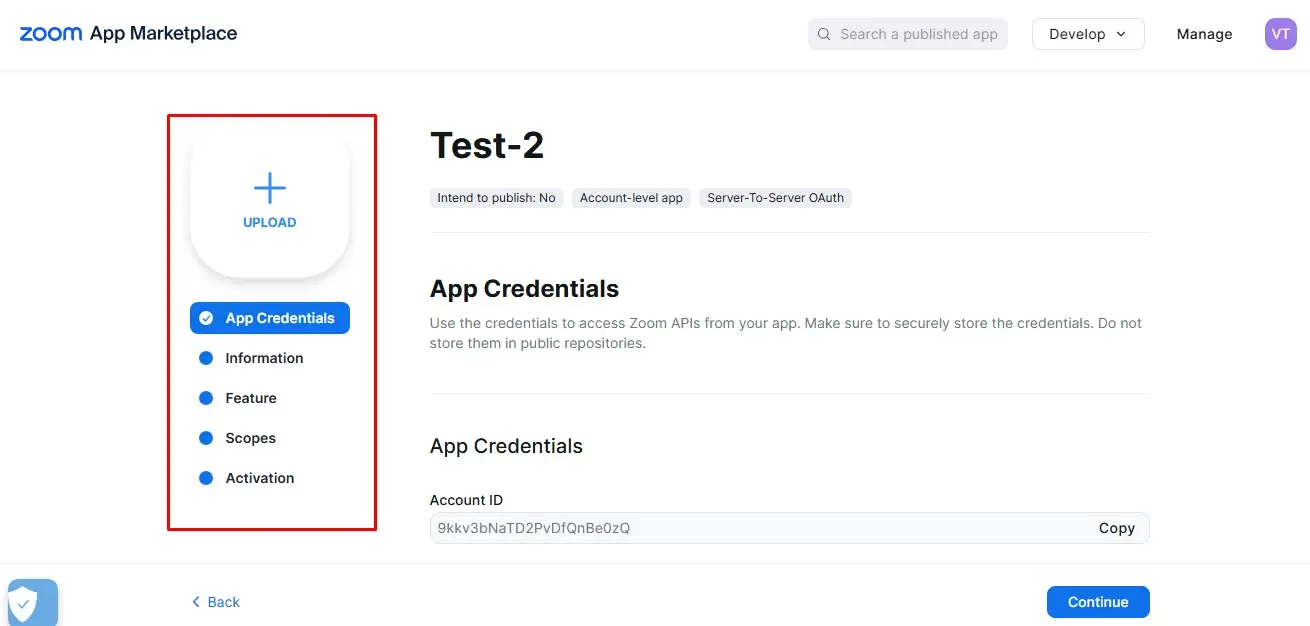
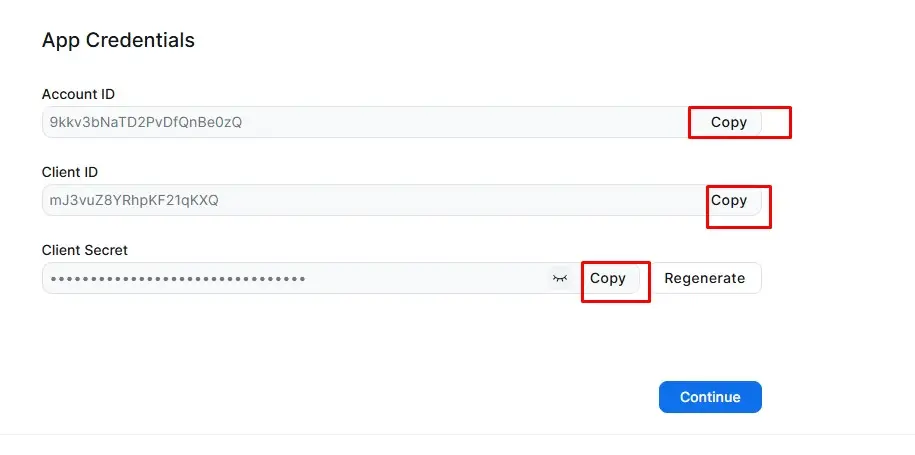
3. App Credentials:
- Save the Client ID, Client Secret, and Account ID securely.
Set API Scopes
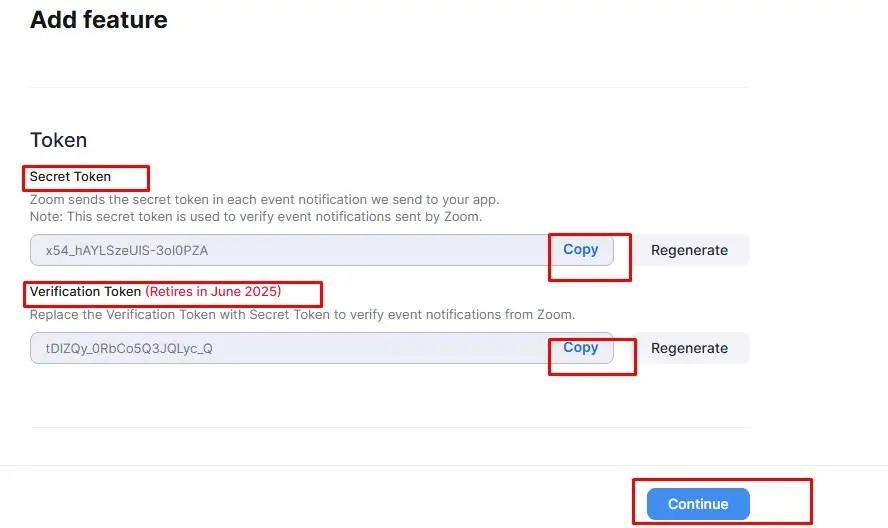
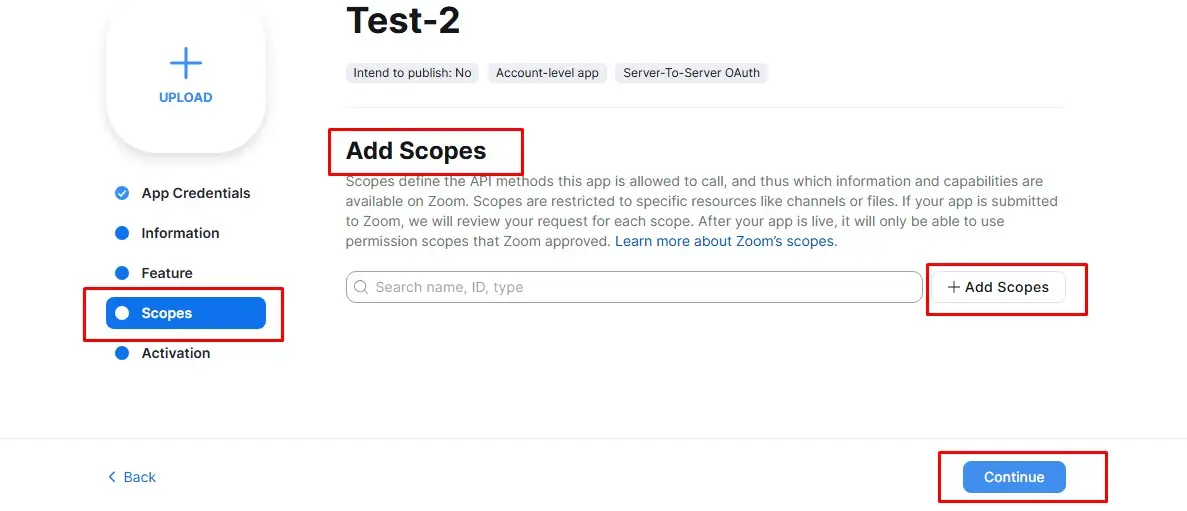
Go to Scopes tab in the app setup:
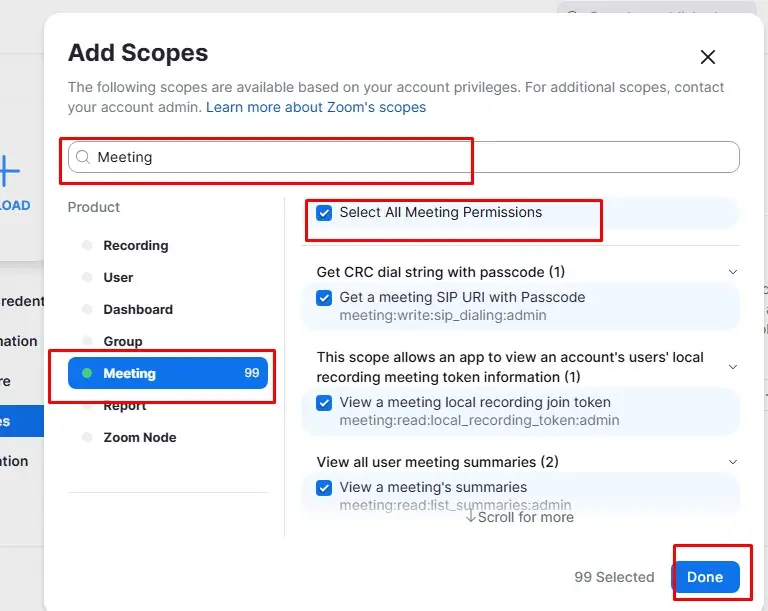
- Click "+ Add Scopes".
- Add scope: meeting:write:admin to create meetings.
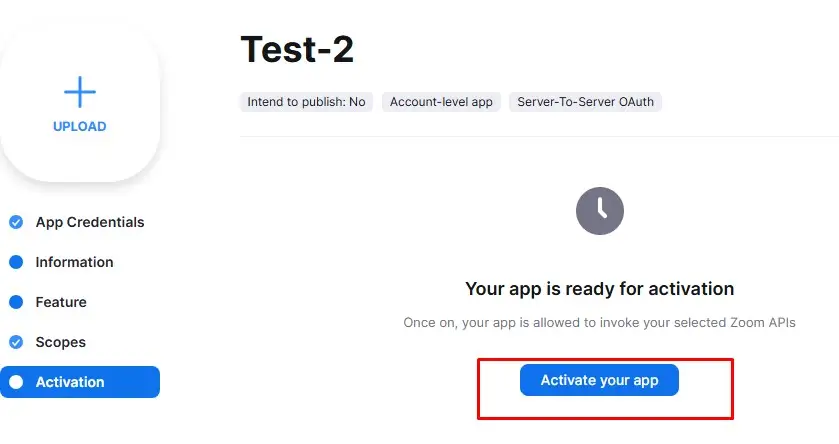
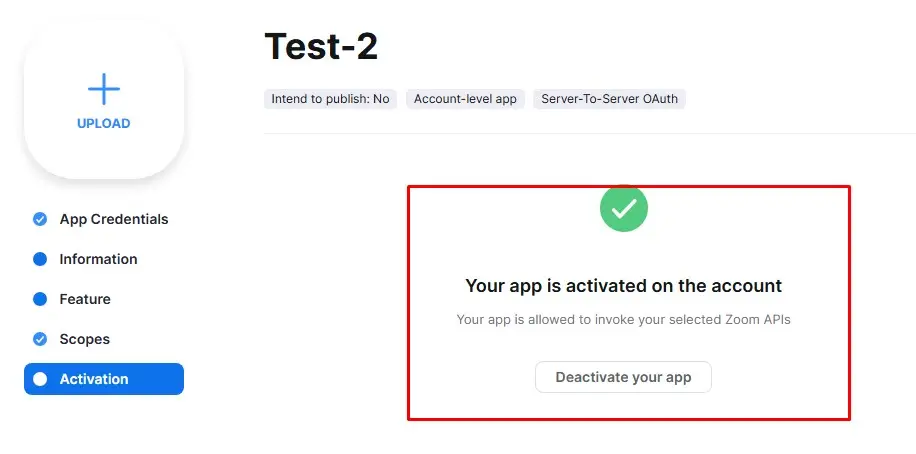
Save and Activate the app.
Step 3: Create a Power Automate flow for Zoom API Access
1. Trigger: Use the "When an appointment is created" trigger from the Microsoft Bookings connector.

Custom Value:

Note:-Paste the booking page link in the custom Value and remove first part from https till calendar/ from the link and remove last part from /booking till last. Rest of the part of the link paste in the Custom value. For reference, check below https://outlook.office.com/owa/calendar/VJTest@53ldh0.onmicrosoft.com/bookings/?ismsaljsauthenabled
Step (4-a1): “To Convert Time” just after "When an appointment is created" trigger
Step 1: Add a new action:-“Compose”


1. In the expression paste this formula:-
convertTimeZone(triggerOutputs()?['body/startTime'], 'UTC', 'Eastern Standard Time', 'MM-dd-yyyy hh:mm tt')
Note:- the above yellow part is the “output value of Start Time” will come from dynamic value. And change the Time Zone as per your location of USA. Here are the values of USA time zone, copy and paste in the expression.
Here are some common U.S. time zone IDs you can use:
Region |
Time Zone ID |
|---|---|
| Eastern Time (ET) | 'Eastern Standard Time' |
| Central Time (CT) | 'Central Standard Time' |
| Mountain Time (MT) | 'Mountain Standard Time' |
| Pacific Time (PT) | 'Pacific Standard Time' |
Step 4: Generate Zoom Access Token
Action 1: Generate a Zoom Meeting Link via HTTP Request
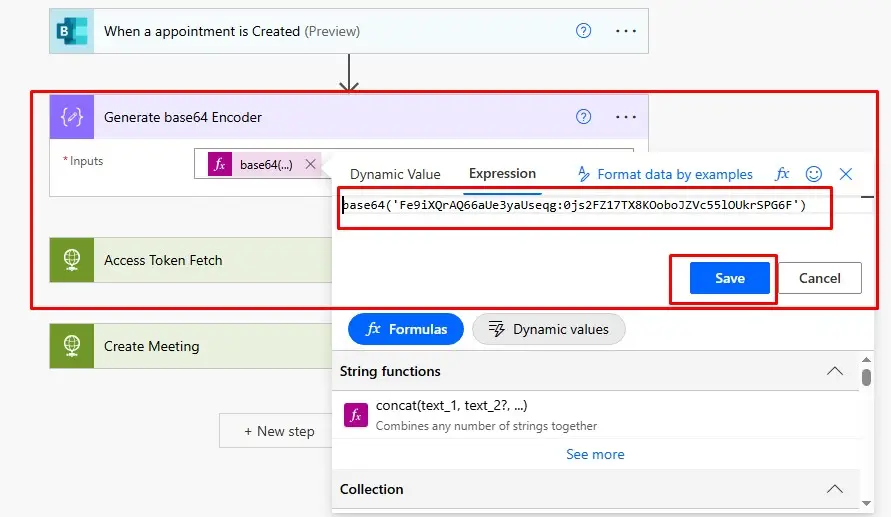
Action 1: Add a “Compose” and rename it “Generate base64 Encoder”
Inside the compose paste an Expression value type:- base64(ClientID:ClientSecret)
Put the (ClientID:ClientSecret)which was saved earlier.
Step 5: Use Power Automate to Get Token
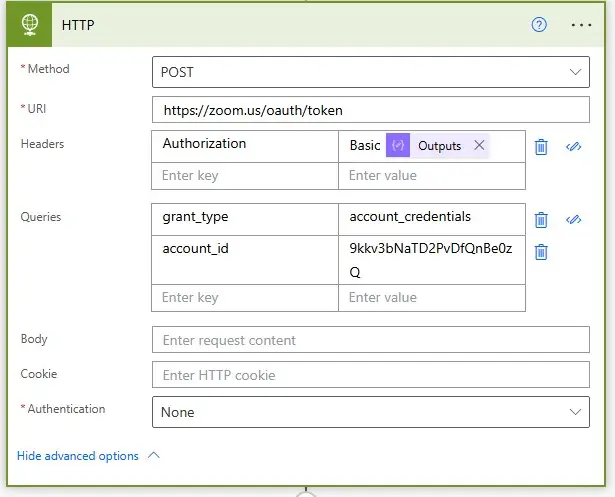
Action 2: Add an “HTTP” Action: and rename its name to HTTP
- Method: POST
- URI: https://zoom.us/oauth/token
- Headers
Authorization: Basic (Output of Generate base64 Encoder )
Content-Type: application/x-www-form-urlencoded
- Queries:
: account_credentials
account_id: Paste account_id here (get account id from zoom market place)
Step 6: Create a Zoom Meeting via API
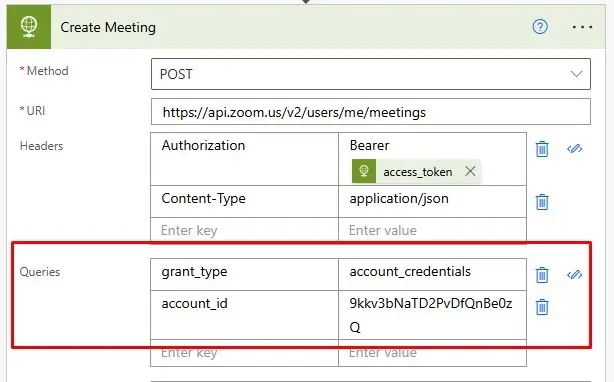
Action3: Add an “HTTP” Action: and Rename HTTP to Create Meeting
- Method: POST
- URI: https://api.zoom.us/v2/users/me/meetings
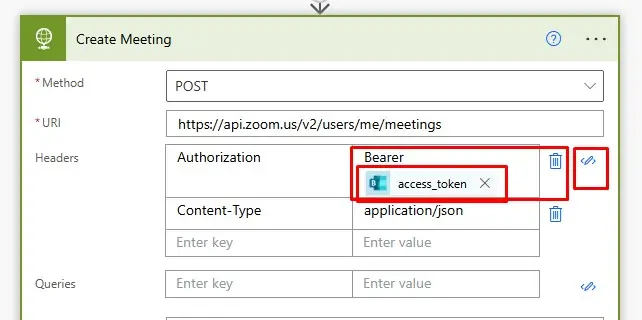
Headers: { "Authorization": "Bearer ACCESS_TOKEN", "Content-Type": "application/json" }
Note:- Put Access Token value in Expression:-
body(‘Access Token Fetch’)?[‘access_token’]
Note:- After Bearer write the following expression in expression tab:-
body(‘New Name of HTTP action ’)?[‘access_token’]
if your HTTP action name is different then write your action name.
body(‘______’)?[‘access_token’]
Below images used are used for inside body parameters :
Example:
Body:
{
  "topic": "Zoom Meeting",
  "type": 2,
  "start_time": Under dynamic content select “Output of compose”,
“end_time”: Under expression put this value:         addMinutes(outputs('Compose'),30),

  "duration": 30,
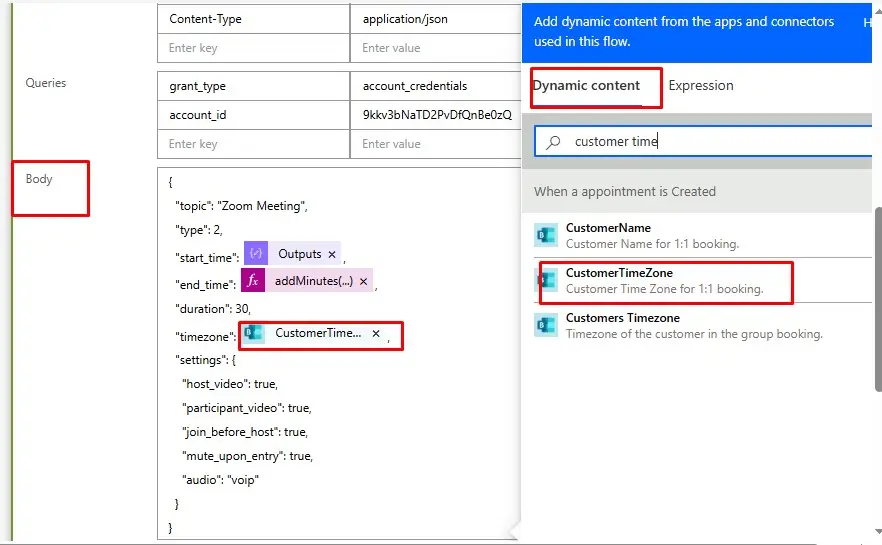
  "timezone": Under dynamic content select “customer time zone for 1:1 meeting”,
  "settings": {
    "host_video": true,
    "participant_video": true,
    "join_before_host": true,
    "mute_upon_entry": true,
    "audio": "voip"
}
}
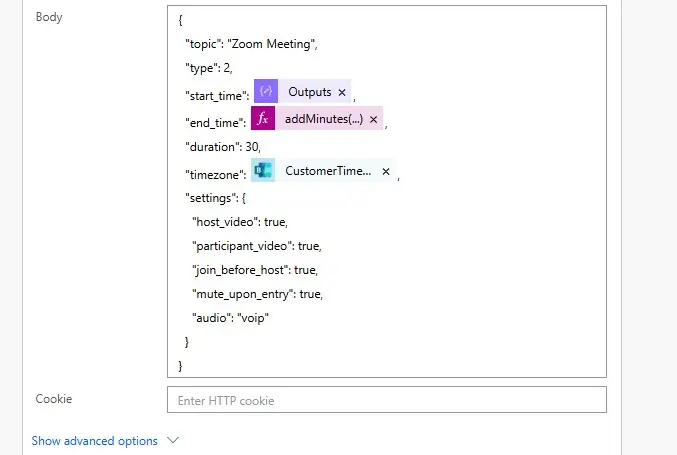
1.body{start_time}
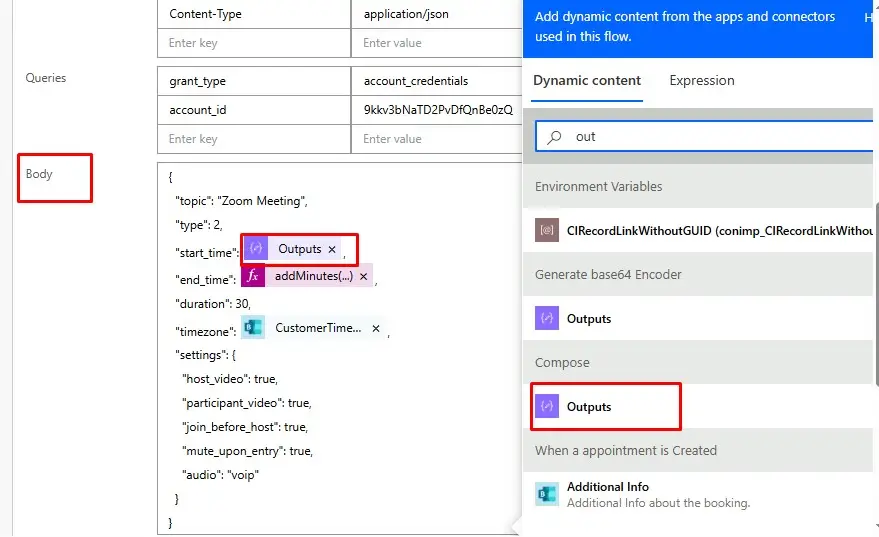
2.body{end_time}
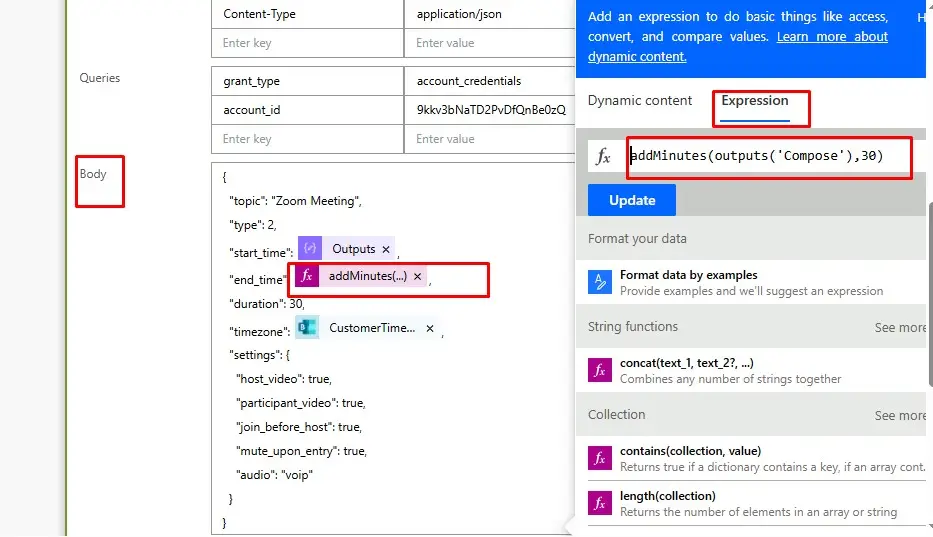
3. body{timezone}
Step 7:- Add an Action named “Parse JSON”
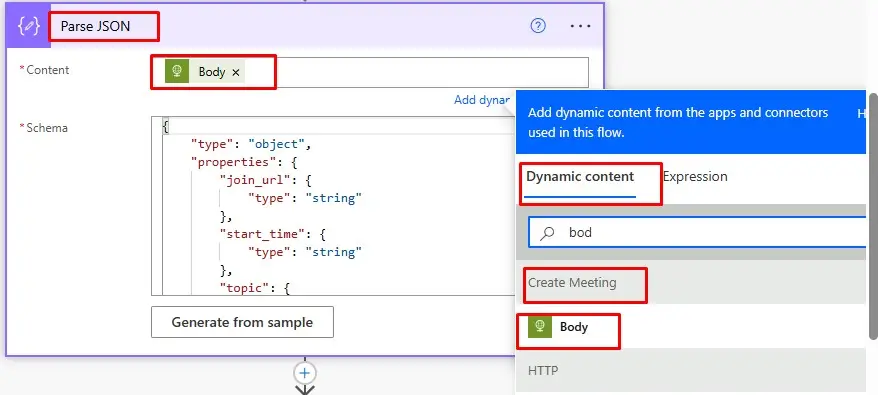
Content: In the content add dynamic value “Body” of Create Meeting
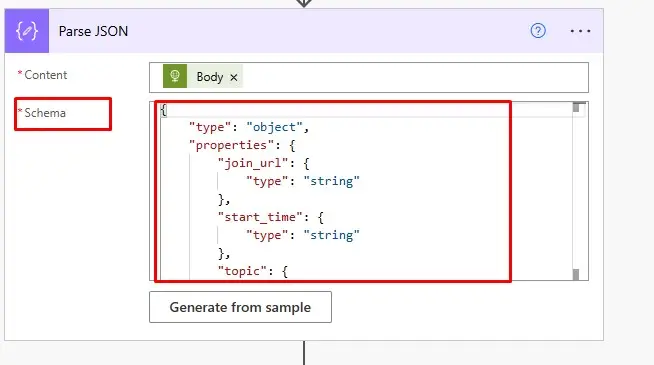
Schema:- paste this Schema and save it.
Example:
{
    "type": "object",
    "properties": {
        "join_url": {
            "type": "string"
        },
        "start_time": {
            "type": "string"
        },
        "topic": {
            "type": "string"
        },
        "password": {
            "type": "string"
        } ,
        "Meeting ID": {
            "type": "string"
        }

    }
}
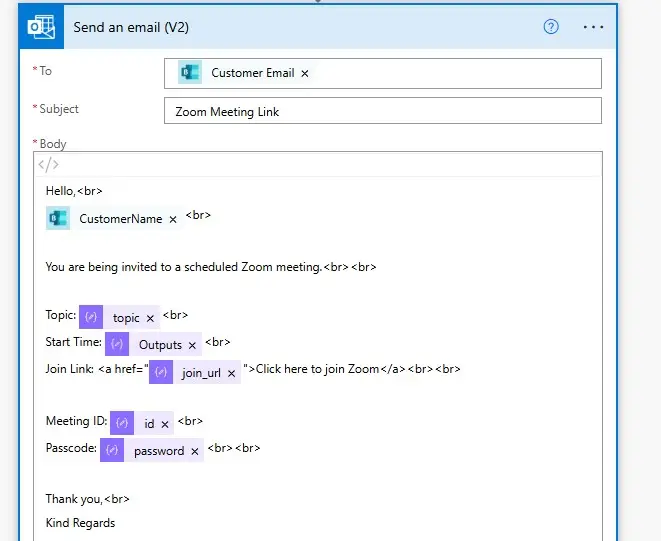
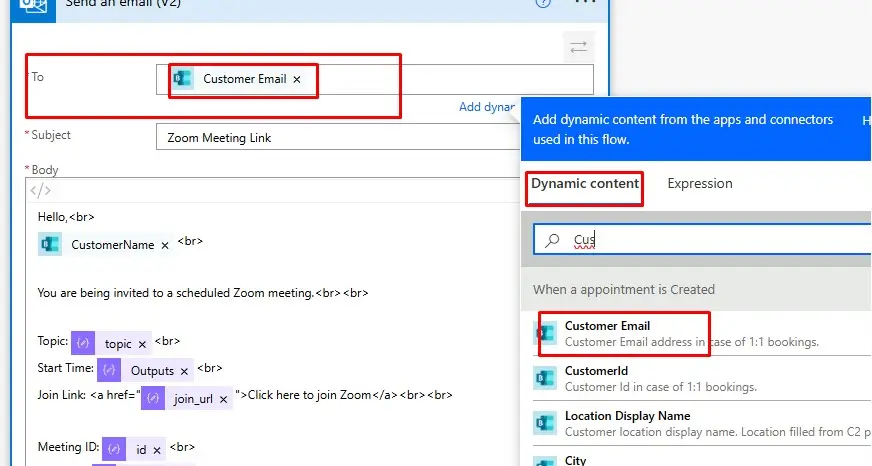
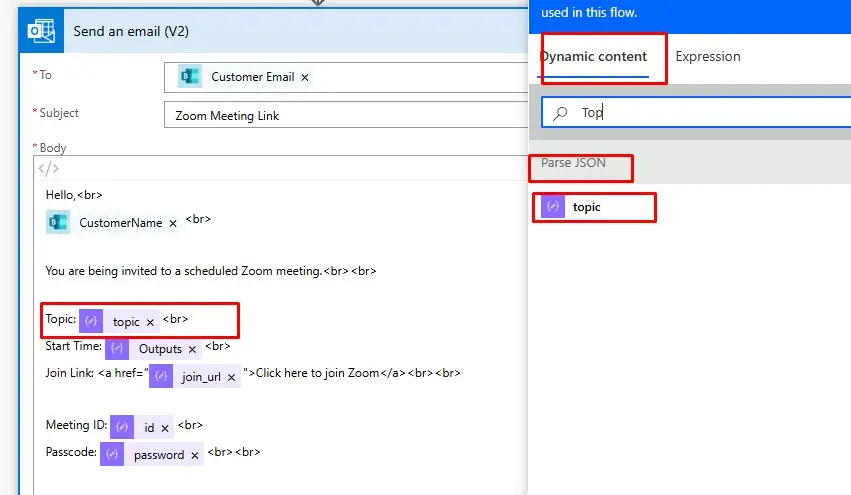
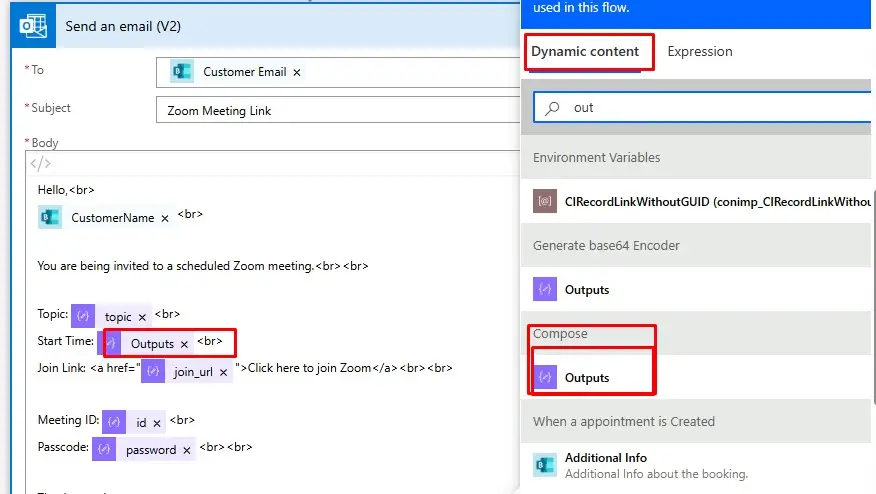
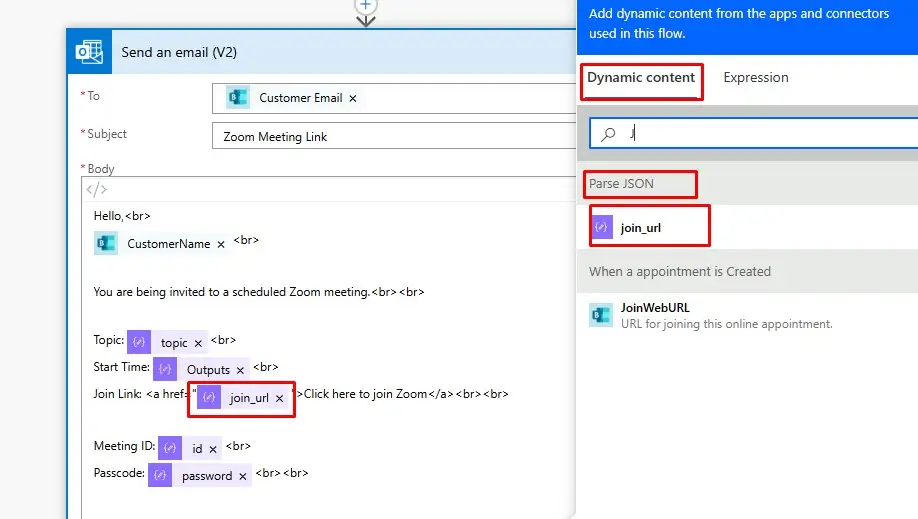
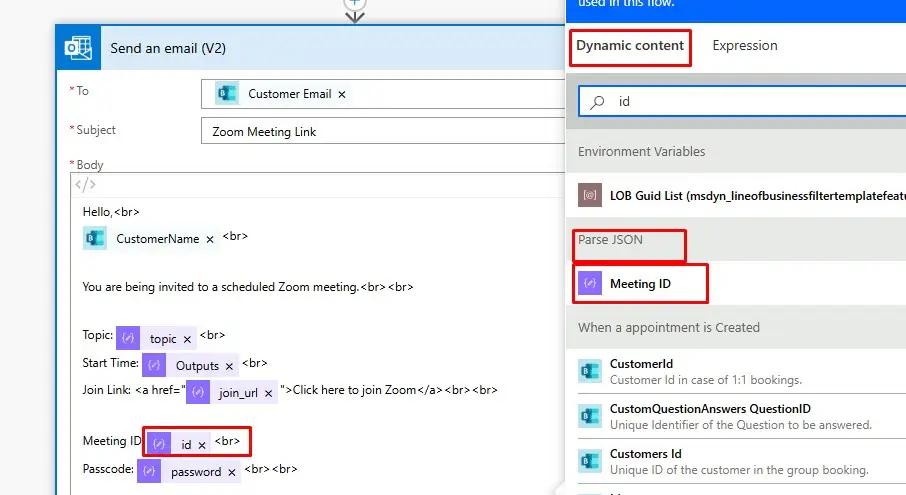
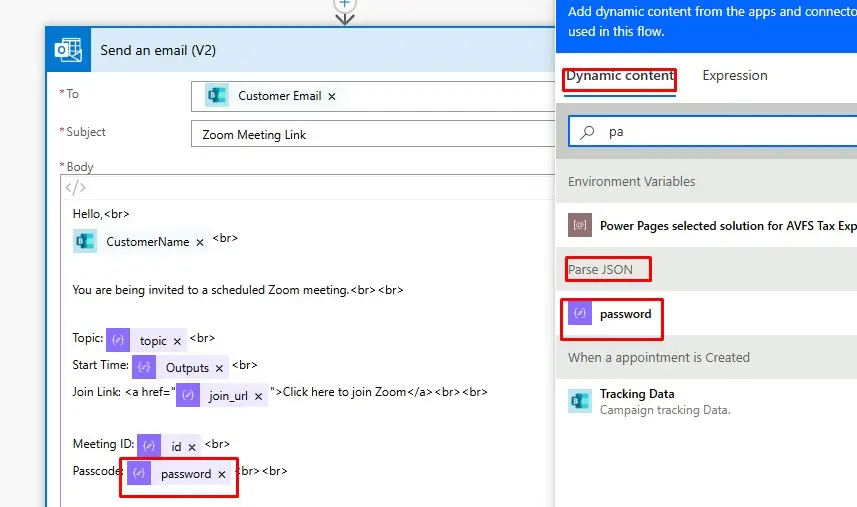
Step 8:- Add an action named “Send an Email (V2)”
To: paste the dynamic value “Customer Email”
Subject:- Write the Subject
Body:- Paste this format in HTML mode.
 Hello,

    (Dynamic value “Customer Name”)


    You are being invited to a scheduled zoom meeting.


    Topic: body(‘Parse_JSON’)?[‘topic’]

    Start Time: outputs(‘Compose’)

    Join Link: Click here to join Zoom


    Meeting ID:- body(‘Parse_JSON’)?[‘id’]
    Passcode: body('Parse_JSON')?['password']


    Thank you,

    Kind Regards

Note:- Save the flow and create a meeting from “Booking” and check flow is working. Then check meeting is created in Zoom App.
If you have any doubts or questions related to this blog, you can Contact us by Email: info@voxtus.com
Himanshu Nauityal
Power Automate Consultant
Power Automate Related Posts


