Learn with

Creating Flows from Scratch using Different Types of Triggers
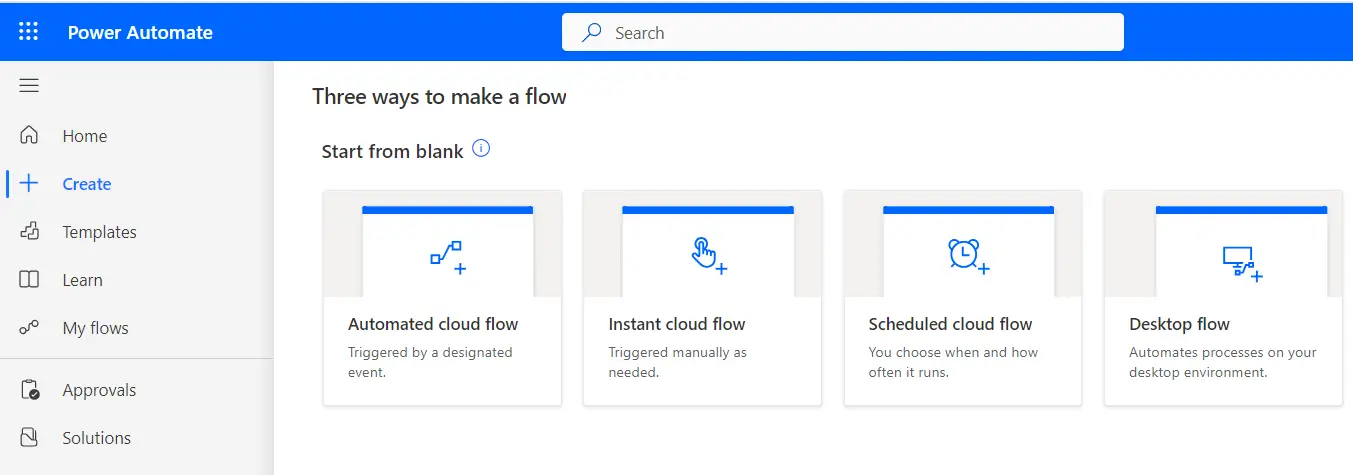
Automated Trigger Flows
- Initiated by specific events or triggers.
- Respond to changes or actions in apps or systems.
- Used for streamlining business processes and data integration.
Creating an Automated Flow
In this example we will set up a workflow that sends email notifications to the owner whenever a row is added, deleted, or modified in a data table.
Step 1: Access Power Automate
- Start by logging into the Power Automate portal (make.powerapps.com) Sign in using your Microsoft account or organizational credentials.
Step 2: Begin Flow Creation
- Navigate to the "My Flows" section, Look for "New flow” option.
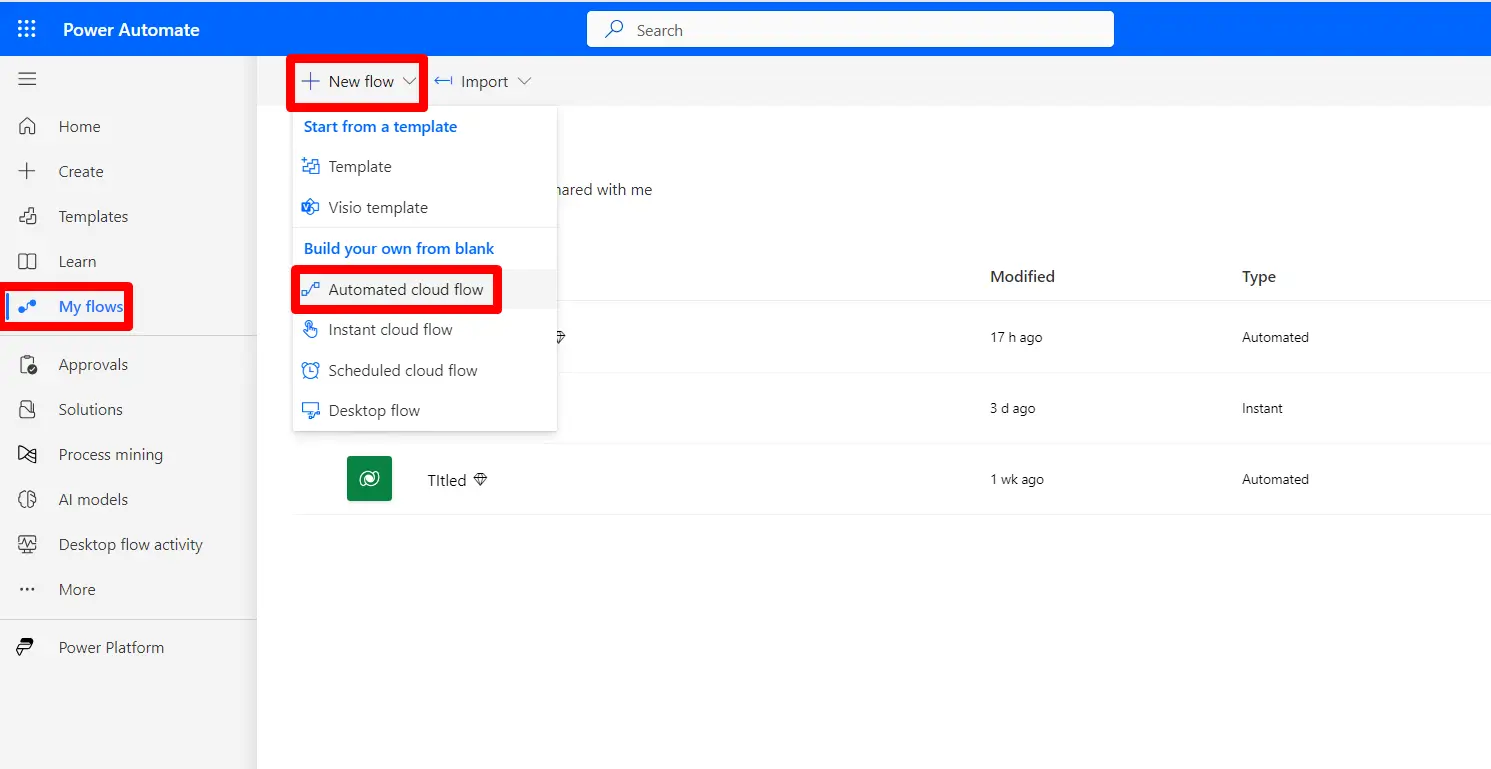
Step 3: Select a Trigger
- Choose a trigger for your flow. A trigger is the event or condition that initiates your automation. There are various types of triggers, including manual, automated, and scheduled.
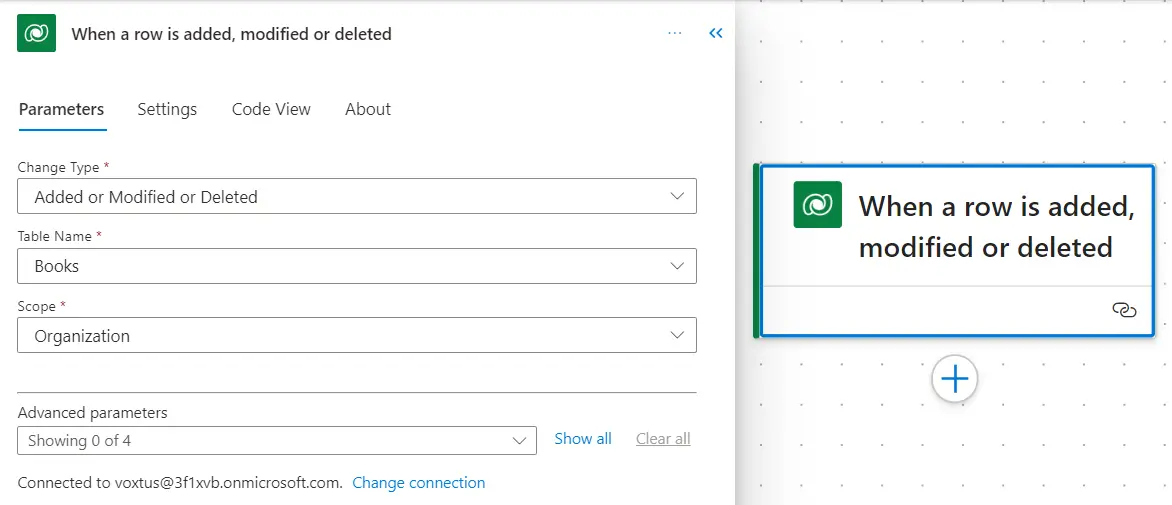
- In this example we have selected Dataverse trigger When a row Added Modified or Deleted.
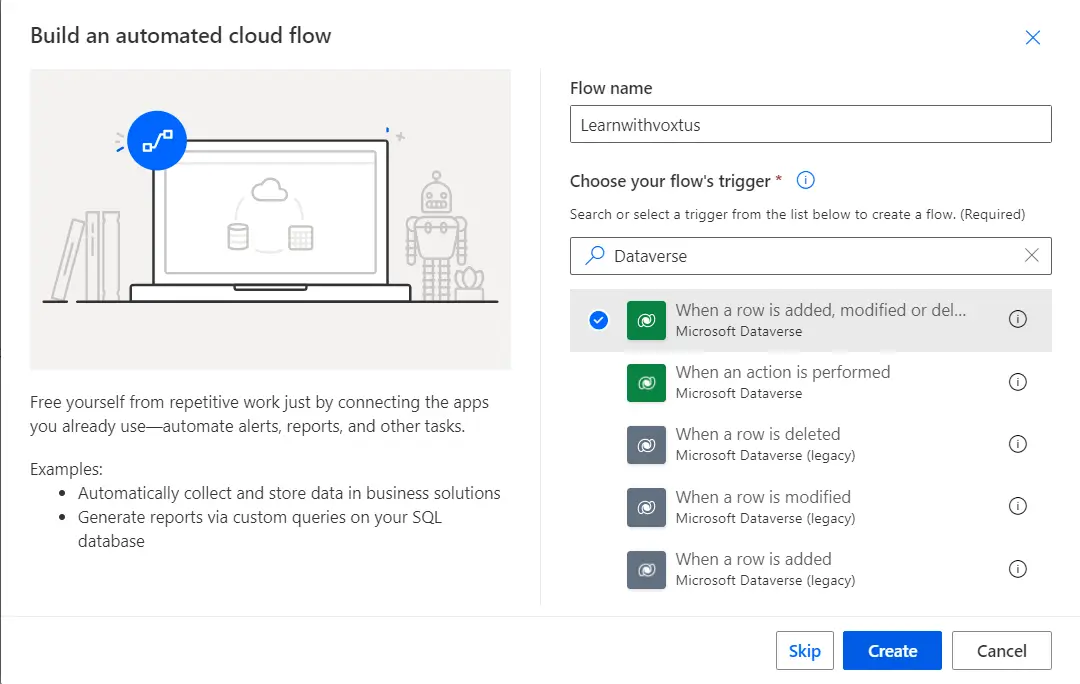
Step 4: Configure the Trigger
- After selecting your trigger, you will be prompted to configure it.
Step 5: Add Actions
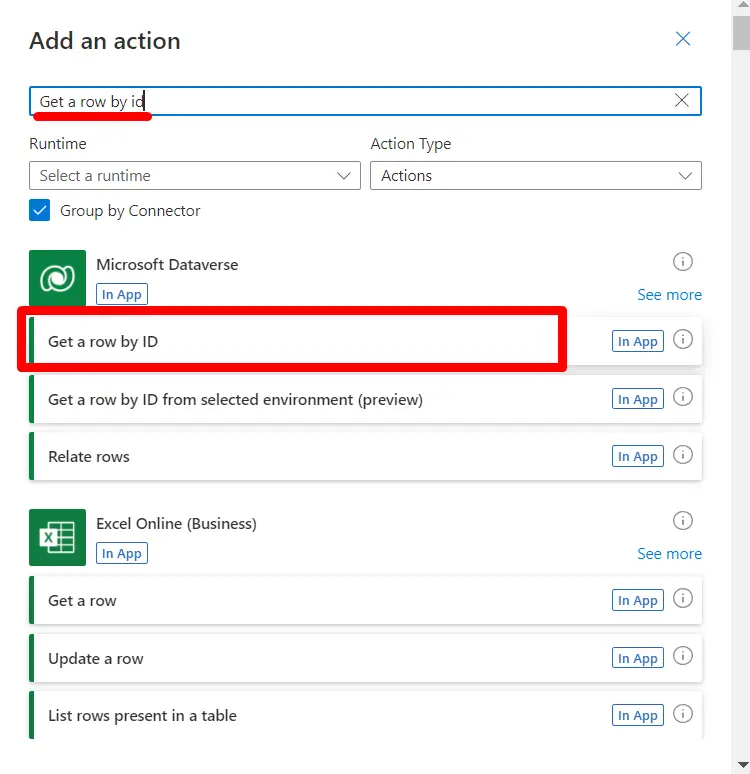
- Once your trigger is set up, you can start adding actions to your flow. Actions are the specific tasks your flow will perform when the trigger condition is met.
- Action can be added by clicking on Icon.
Step 6: Configure Actions
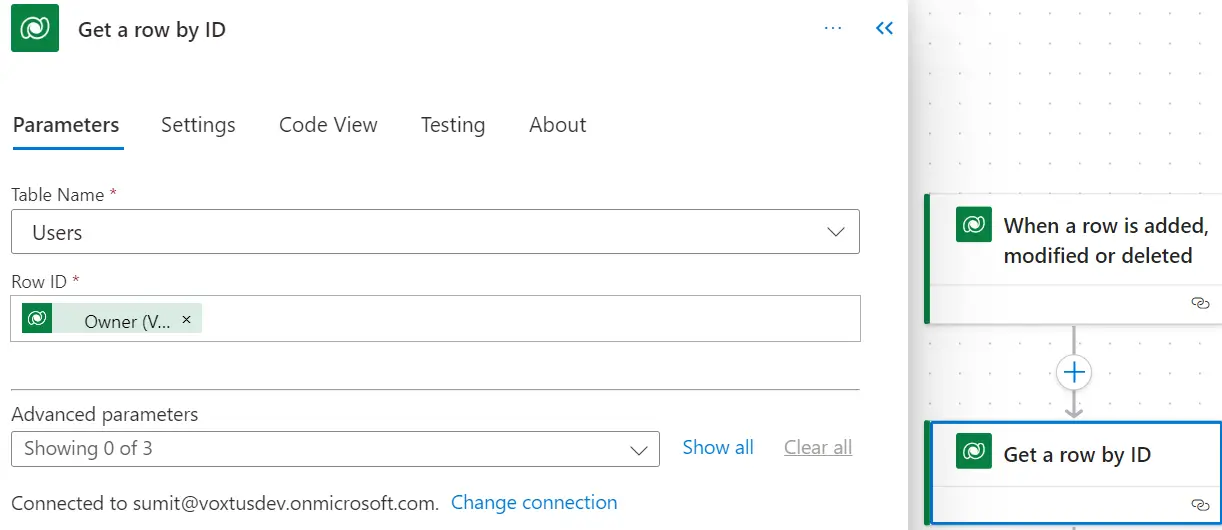
- For each action, you'll need to configure its settings. This typically involves specifying data sources, recipients, message content, or other parameters.
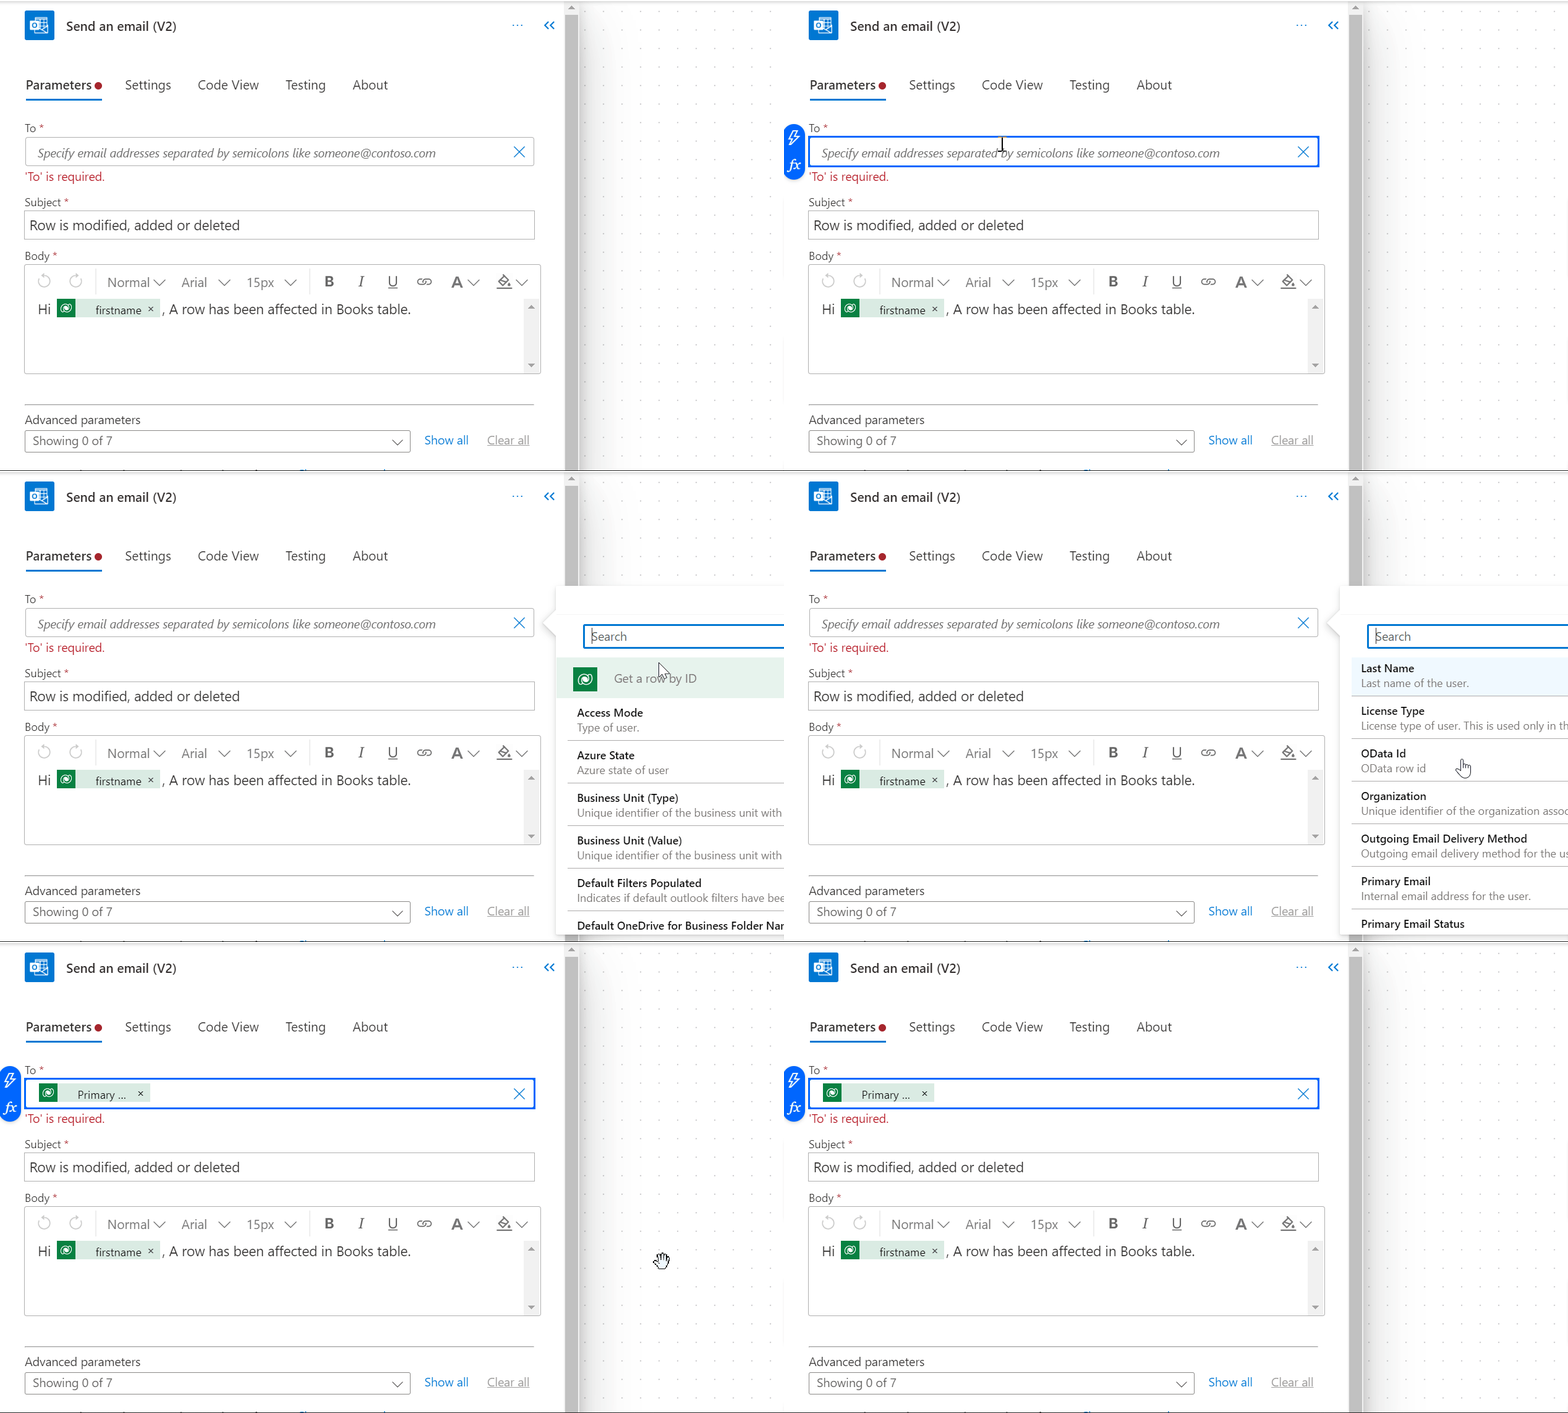
- We’ve added and configured two actions one is to get the details of owner
- Another Action is to send email to owner.
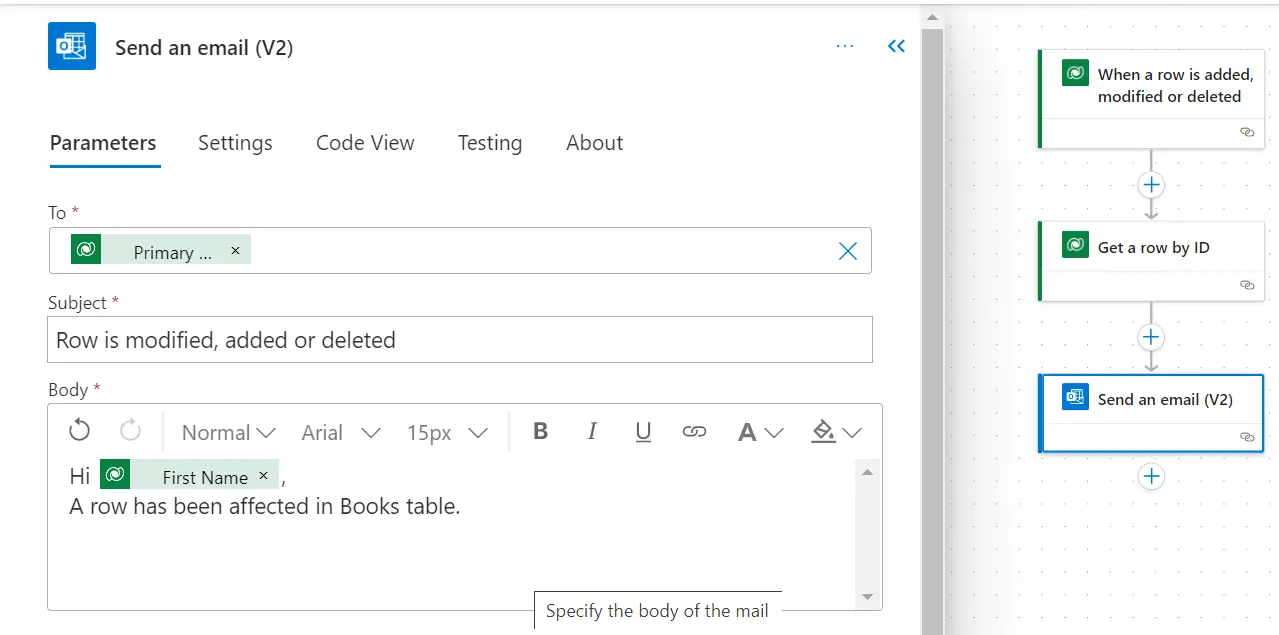
To Add Dynamic Content:
Step 7: Test and Save Your Flow
- It's a good practice to test your flow before finalizing it. Once satisfied, save your flow
- To test this flow we have deleted a row from our “Books” table so that flow will get triggered.
- Once the flow has successfully run, you will receive an email at the owner's email address.

Step 8: Activate the Flow
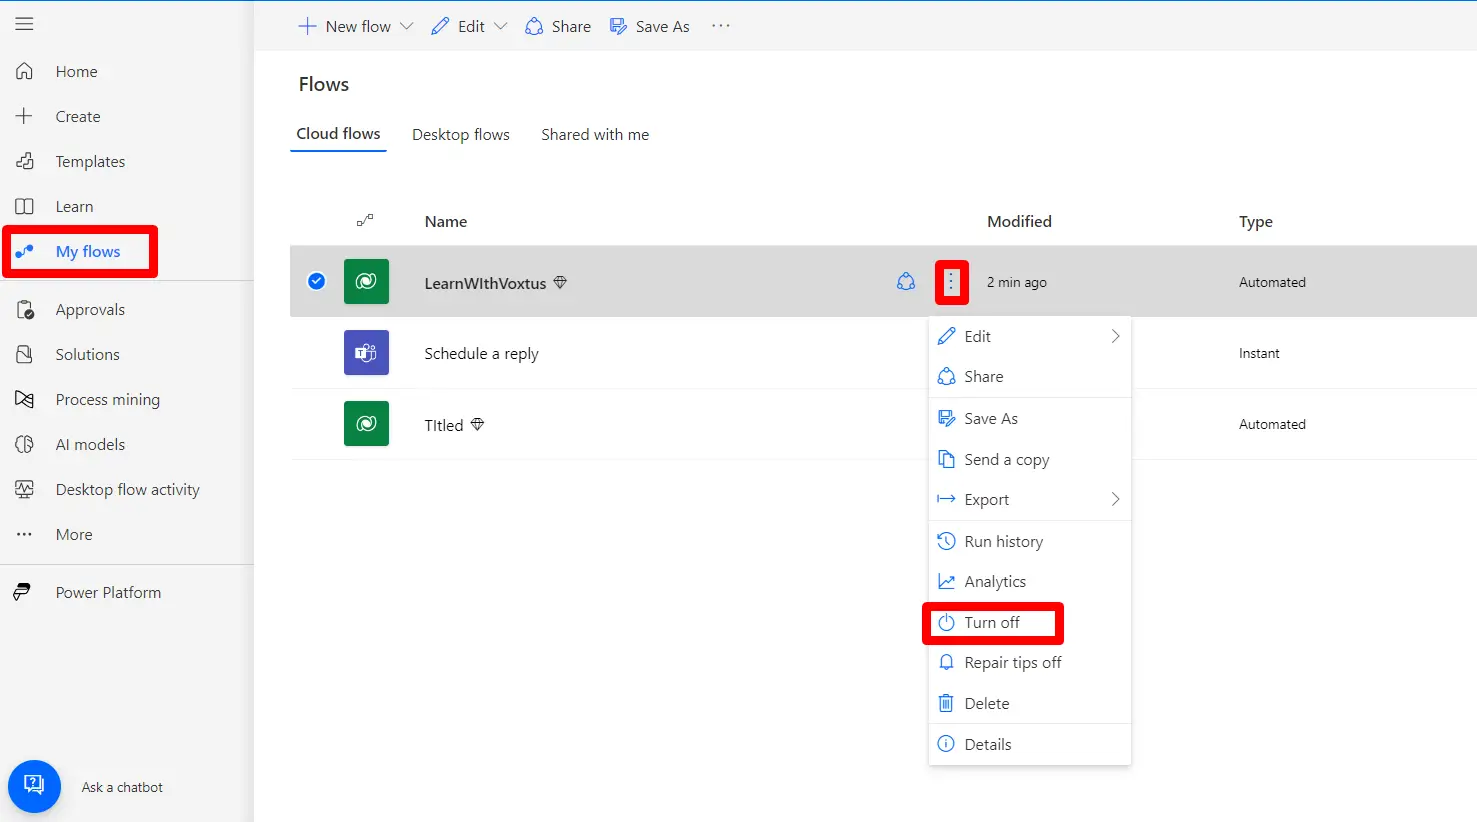
- You can activate and deactivate your flow. Once activated, it will respond to the trigger events as defined.
