Learn with

Scheduled Trigger Flows
Scheduled Trigger Flows
- Run at specified times or on a recurring schedule.
- Suitable for automating tasks at predefined intervals.
- Used for actions like sending reports, creating calendar events, and regular updates.
Creating a Scheduled Flow
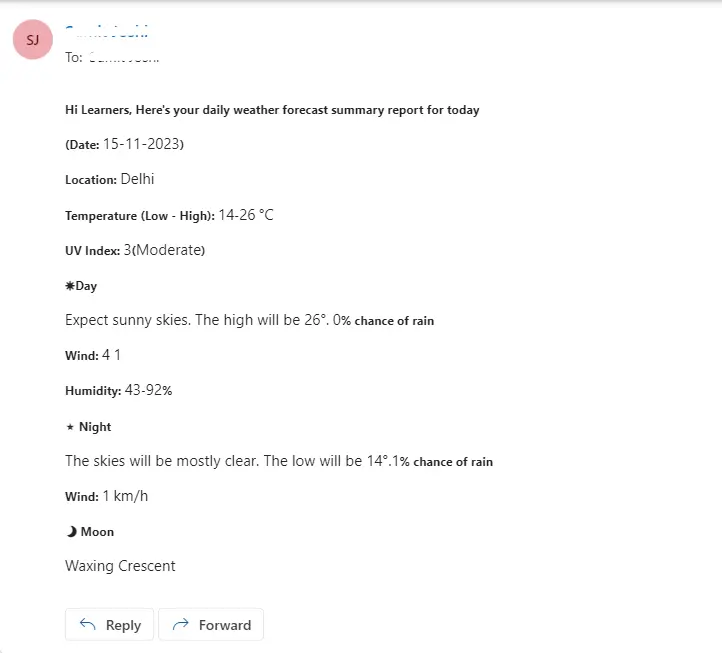
Let's create an easy example: Imagine you want to receive a daily email with the weather forecast for your location. You can use Power Automate to schedule and automate this task:
Step 1: Access Power Automate
- Start by logging into make.powerautomate.com with your Microsoft account or organizational credentials.
Step 2: Begin Flow Creation
- Navigate to the "My Flows" section, Look for "New flow” option.
- Choose the "Scheduled cloud flow" option to create a flow that automates tasks on a predefined schedule. This is useful for routine and repetitive tasks.
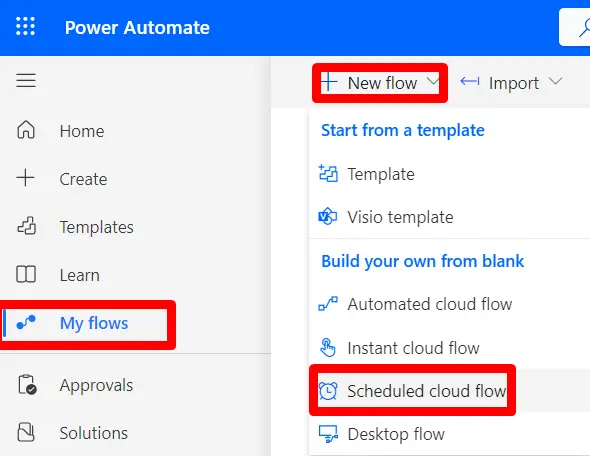
Step 3: Configure the Scheduled Flow Trigger
- After selecting the "Scheduled cloud flow" trigger, you can configure the schedule. Define when and how often the flow should run. You can choose specific dates, times, and intervals.
- For example we’ve scheduled this for everyday from starting date.
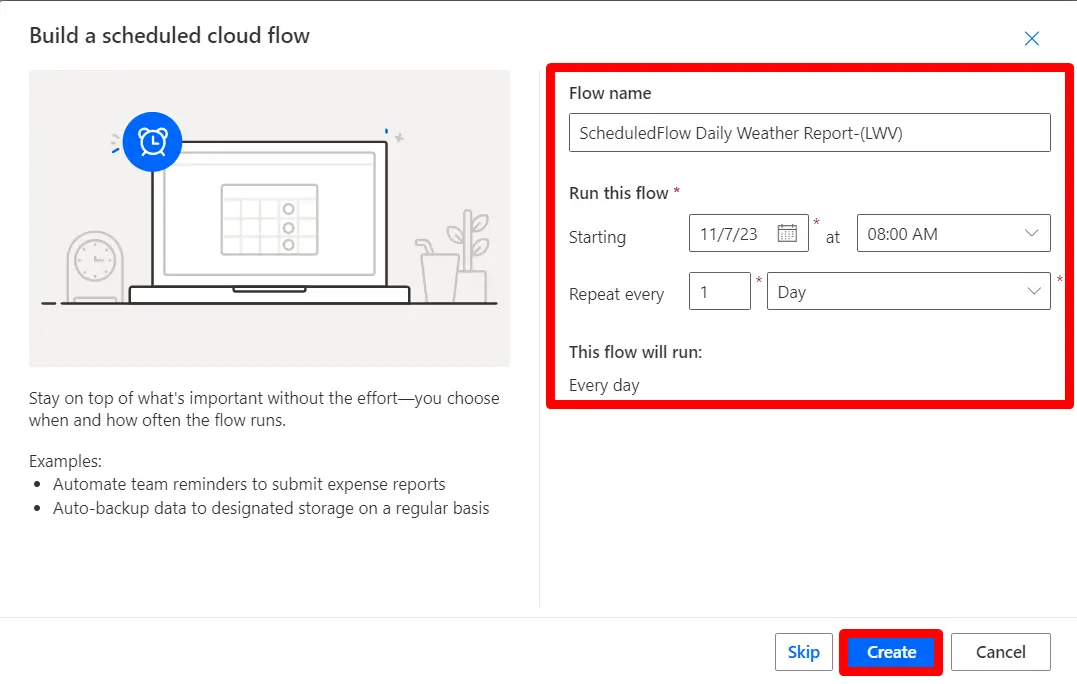
Step 5: Add and Configure Actions to the Scheduled Flow
- With the trigger configured, you can start adding actions to your scheduled flow. These actions are the specific tasks your flow will perform at the scheduled times.
- For each action in the scheduled flow, configure the settings as needed. Specify data sources, recipients, message content, or other relevant parameters.
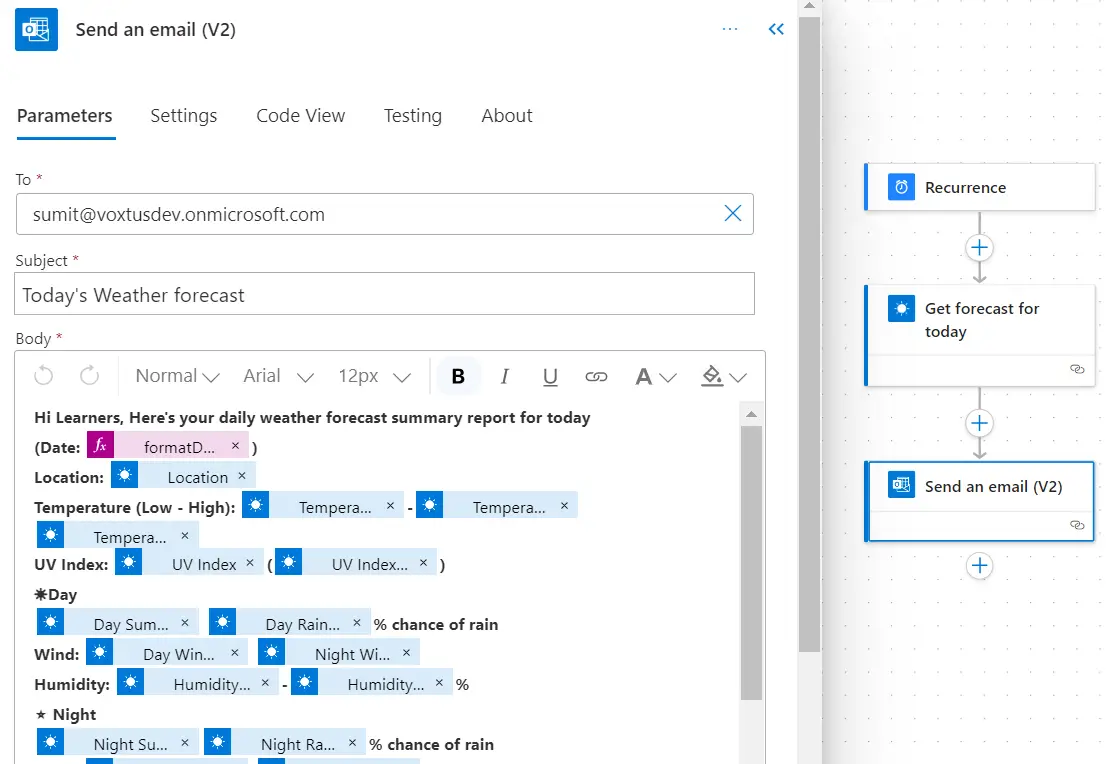
For this example we have add MSN Weather – Get forecast for today action & Outlook Send Email Action.
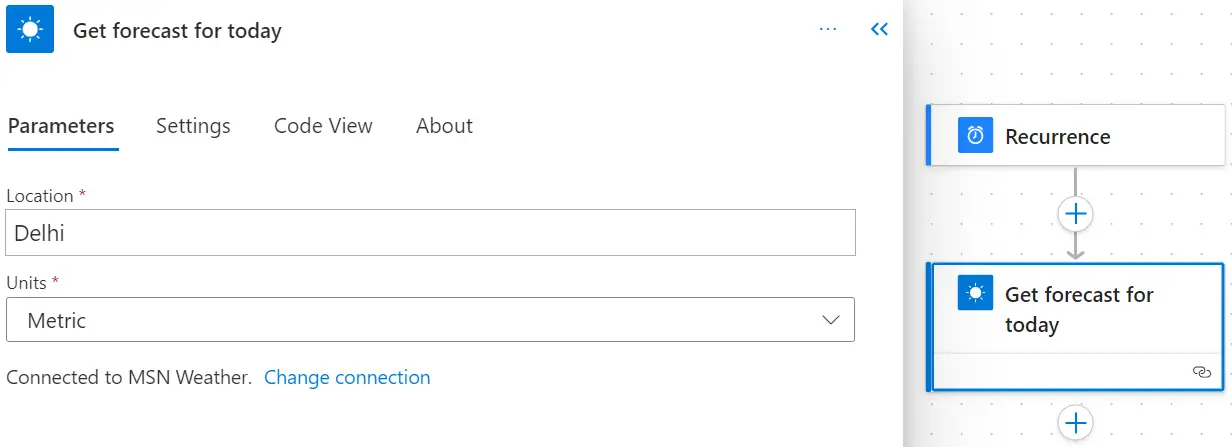
Note: Select Units Property as “Metric” for °C and Imperial for °F.
- For Email message you can directly write mail in Email Body using dynamic content.
Step 7: Test and Save Your Scheduled Flow
- After configuring your scheduled flow, save it. This ensures that the flow is ready to run automatically according to the defined schedule.
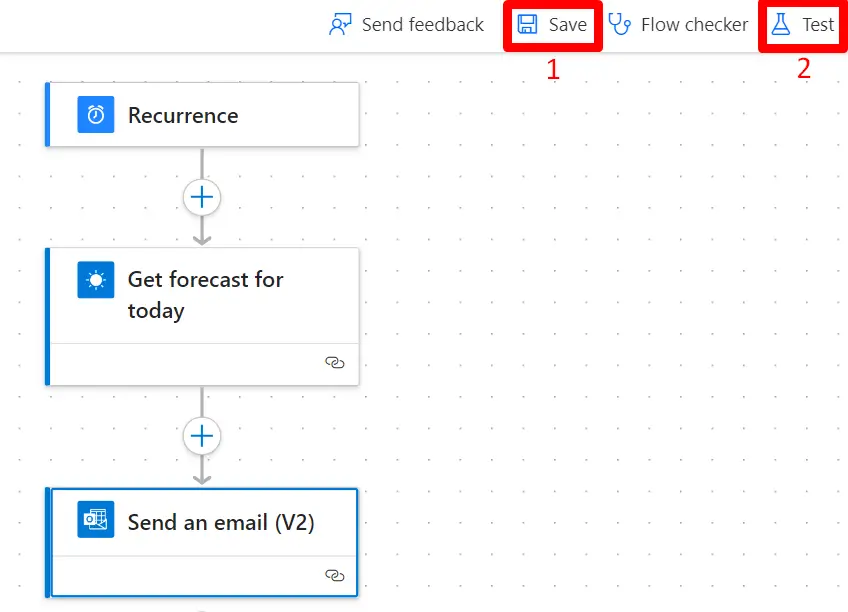
- After successful test run of this flow you’ll get the weather forecast report for today and as it’s a scheduled flow you’ll get weather report on daily basis at scheduled time.
