Learn with

Once you have created this basic application, you can proceed to add additional screens and customize their layouts to meet your specific requirements.
Adding Screens
In Power Apps, screens are an essential part of building and designing your app. Screens serve several important purposes and are added to your app for the following reasons:
- User Interface (UI): Screens provide the user interface for your app. Each screen represents a distinct view or page within your application, where users can interact with data, enter information, view records, and perform various actions.
- Navigation: Screens enable you to create a structured navigation flow within your app. You can define how users move from one screen to another, creating a seamless and logical user experience. This is crucial for building apps that are easy to navigate and understand.
- Separation of Content: Screens allow you to separate different types of content or functionality within your app. For example, you might have a screen for data entry, a screen for viewing reports, and a screen for settings. This separation helps organize your app and keeps related functions together.
- Device Adaptation: Power Apps supports responsive design, and screens play a key role in adapting your app to various devices and screen sizes. You can design screens to work well on mobile phones, tablets, and desktop computers.
- Different Use Cases: Screens can be customized for specific use cases or user roles. You can create screens with different layouts, controls, and functionality to meet the needs of different user groups or scenarios.
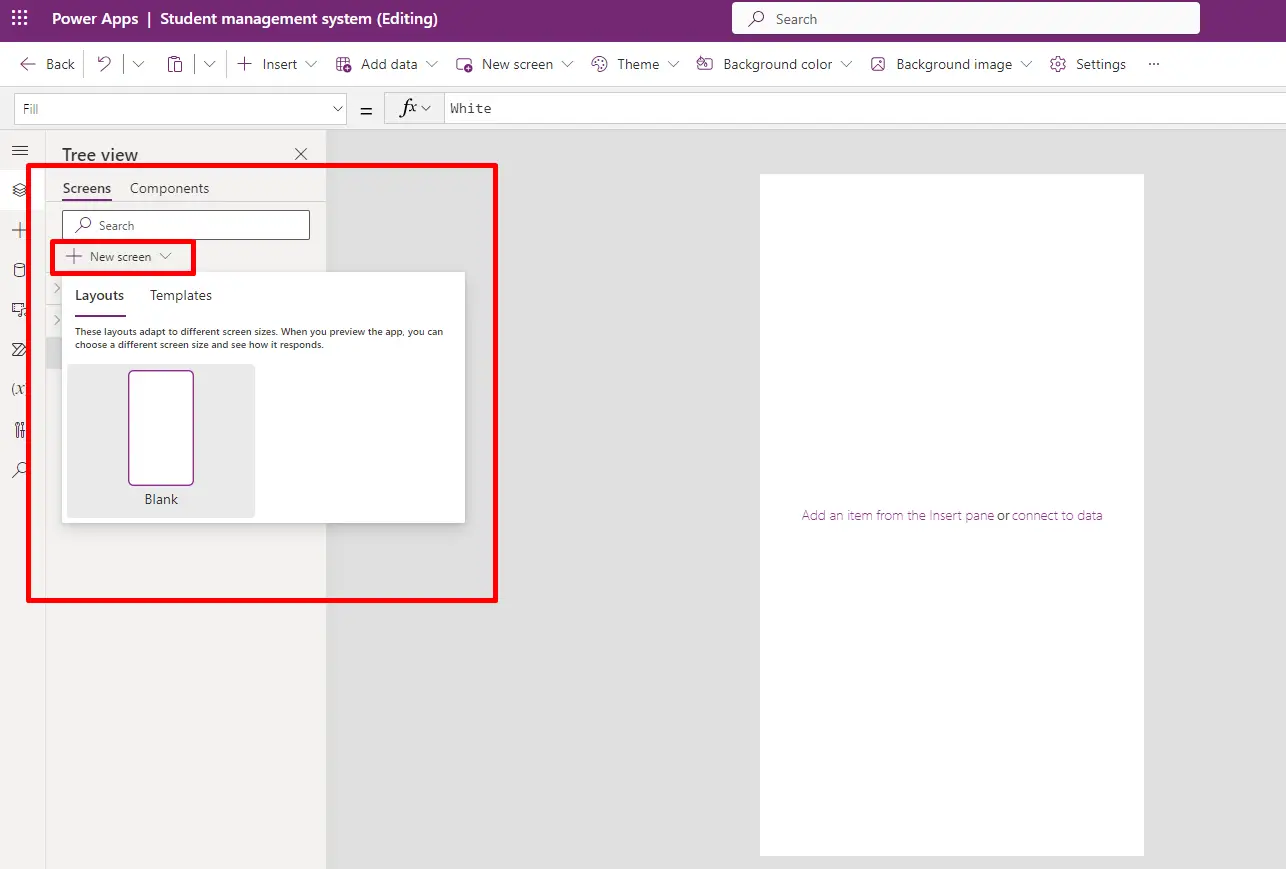
To create a new screen, click on the "New Screen" button located in the top-left corner of the left panel, and select the "Blank Screen" option. Please note that you won't see other layout options as we are using the mobile layout in this context.

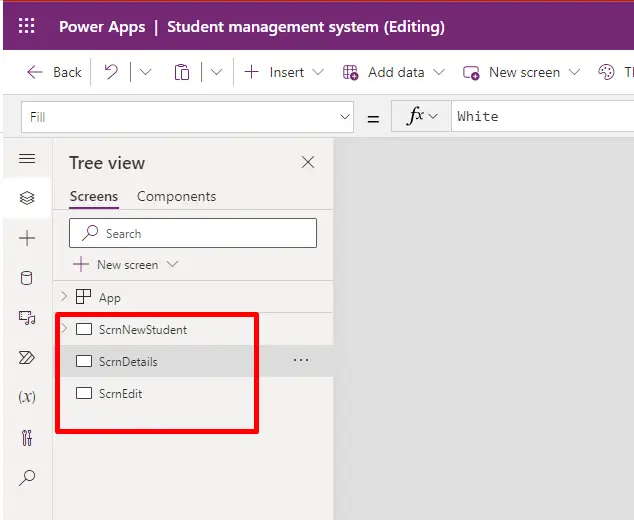
Now, proceed to rename the screens to ensure easy identification. We are transitioning this application into a three-page application, where the first page is designated for adding students, the second screen is intended for previewing students, and the third screen is for editing student information.
