Learn with

Introduction:
Security is a critical consideration when building any app, and Power Apps is no exception. Whether you're working with sensitive data or building applications for multiple user roles, understanding how to configure permissions and implement role-based access control (RBAC) is vital. In this post, we’ll discuss how to set up permissions in Power Apps and explore how to manage access for different roles within your application.
1. Configuring App Permissions
Power Apps allows you to control who can view, edit, or contribute to your app by configuring permissions through Power Apps’ environment settings and by integrating with external services like Microsoft Dataverse or SharePoint.
i. Setting Permissions at the App Level
Power Apps uses Azure Active Directory (AAD) to manage user permissions. You can define different permission levels, including:
- User: Allows users to run the app and interact with it.
- Co-owner: Grants permission to edit the app.
- Admin: Full control over the app, including permissions to share and manage access.
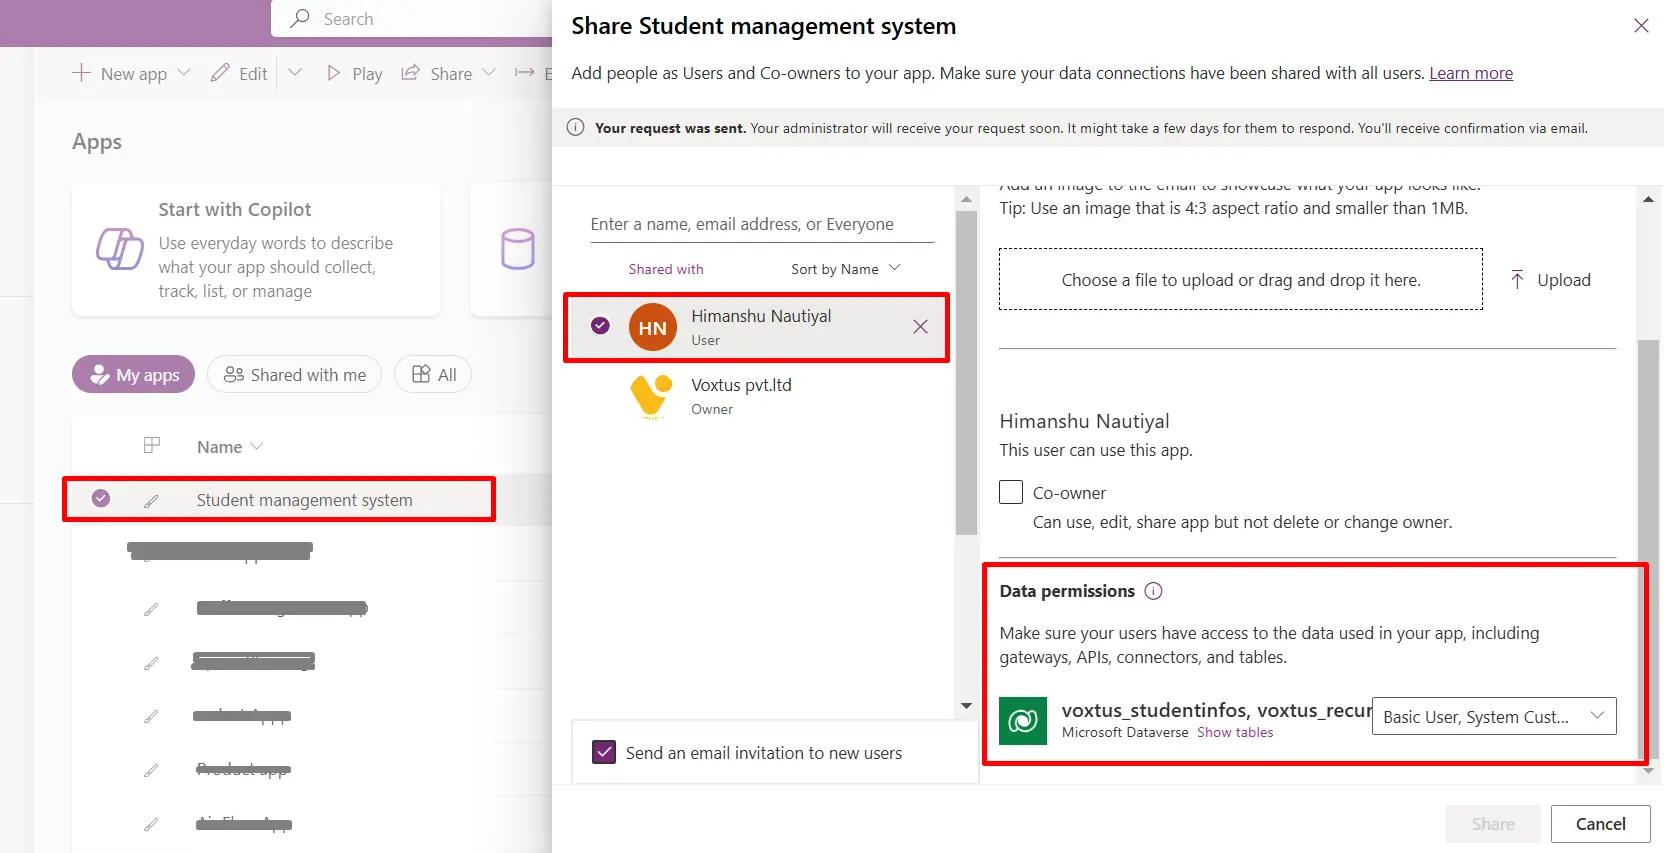
Permissions can be managed via the Share button in the Power Apps Studio, where you can add users or groups and assign appropriate roles.

To configure app-level permissions:
- Open Power Apps Studio.
- Select the app you want to configure.
- Click on Share.
- Add users or groups and assign the required permission level.
b) Data Source Permissions
In addition to app-level permissions, you need to ensure proper access control at the data source level. For example, if you're using a SharePoint list or Dataverse as the backend, make sure that only authorized users have access to the underlying data.
For SharePoint:
- Go to the SharePoint site containing the list or library.
- Set item-level permissions by adjusting the list settings.
- Use column-level security to restrict visibility of sensitive columns.
For Dataverse:
- Go to the Power Platform admin center.
- Navigate to the Dataverse table and configure access settings.
- Use Security Roles to restrict access based on users’ roles in the app.